Design for Commercial Poultry House Plans
You might already know that there are literally endless poultry house designs, structures, systems and sizes…
But, what exactly are they?
Well, I've saved you HOURS in rooting around the net because I've put together a complete list.
Some are old and traditional.
Others are built using more modern techniques.
Others are innovative & experimental.
But I've got them all right here. And I made sure this list is up-to-date for 2021.
Let's get started.
(*Don't have enough time to read this all now? – Download this now as a PDF by clicking the orange button above.)
Key Goals
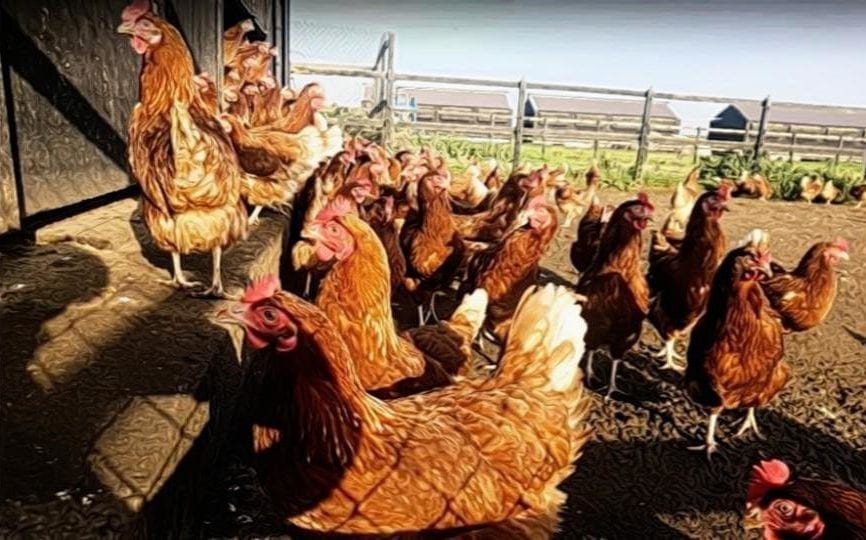
- The comfort of birds is directly related to their growth and laying performance.
- Key features for success: (a) light, (b) stable temperature, (c) fresh air, (d) space & (e) security.
- Cost-effective: both in capital building cost, but also to maintain.
- Convenient and amenable for labourers to perform at their best and not be discouraged.
Location
- Good water drainage to protect the foundations & keep the flock healthy
- Circulation of air for natural ventilation
- Not in a low pocket or hollow (to avoid cold air settling)
- Southern or southeastern alignment.
- Light loam to sandy soil for good drainage.
- Avoid heavy clay which holds water content.
- Tree protection or windbreaks to prevent direct drafts.
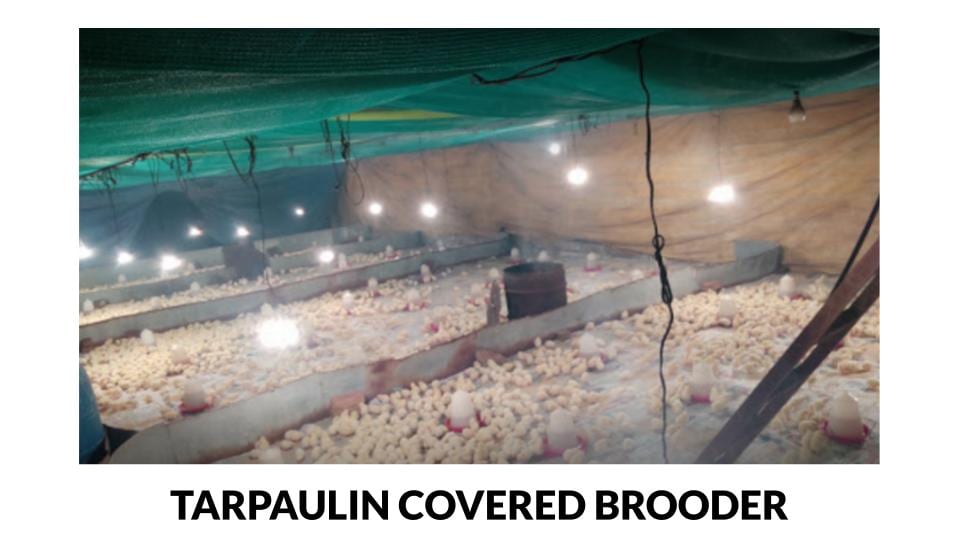
Brooder Houses
Definition:
These are houses for chicks of a day-old and upward.
The first 7 days of care are the most critical days to get right when projecting the performance of broiler or layer chicken.
- Optimised for growth: chicks require conditions that will assist them best through their critical growth stages.
- Ventilated, but not draughty: helps chicks adopt suitable eating and drinking habits.
- At least, 1/3rd sq. ft each chick: providing ample space. Overcrowding kills and stunts performance.
- Ideally, a portable brooder house: to allow for siting adjustments for best results.
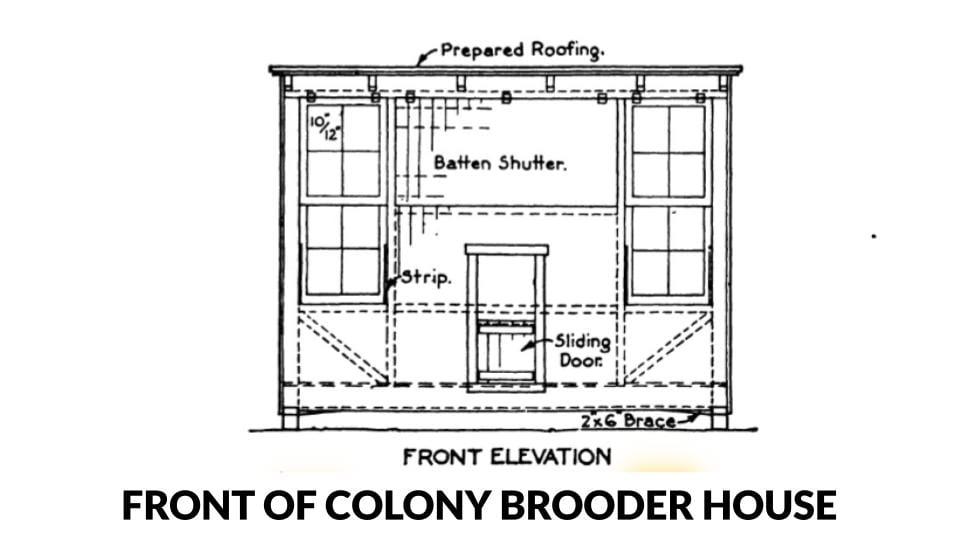
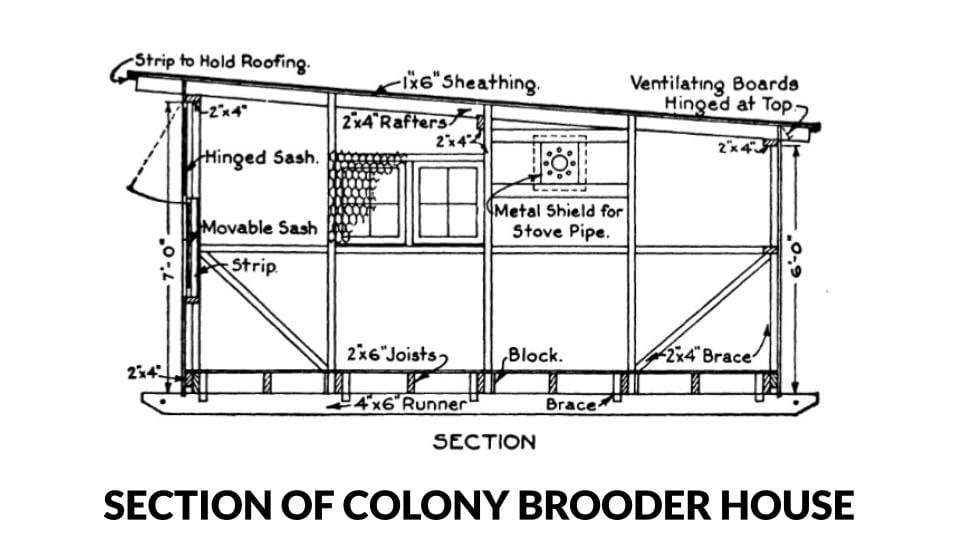
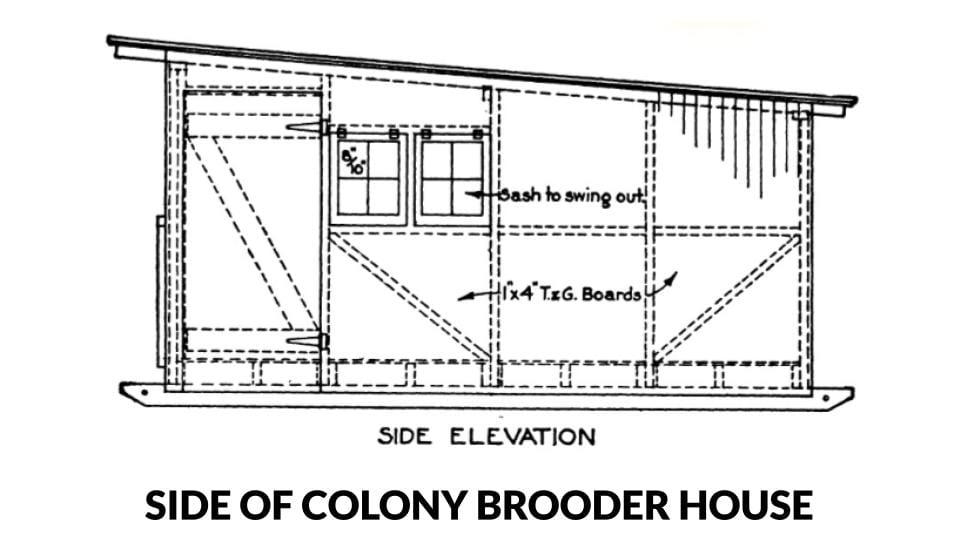
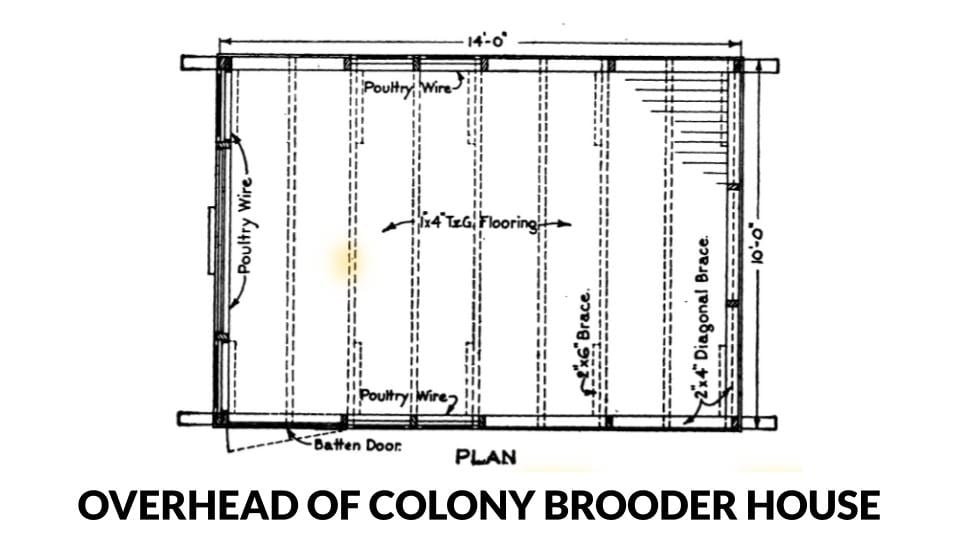
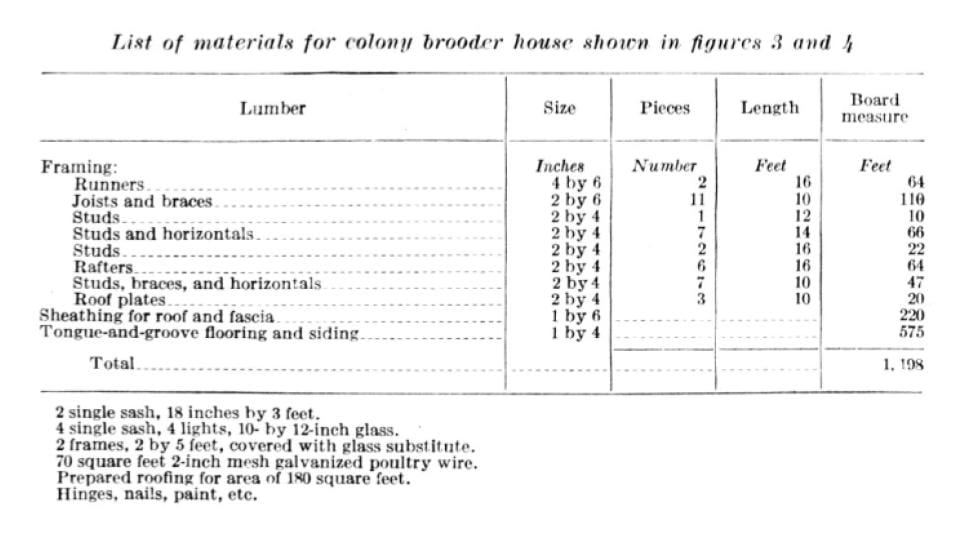
Colony Brooder House (including plans)
Definition:
A portable house for brooder chicks.
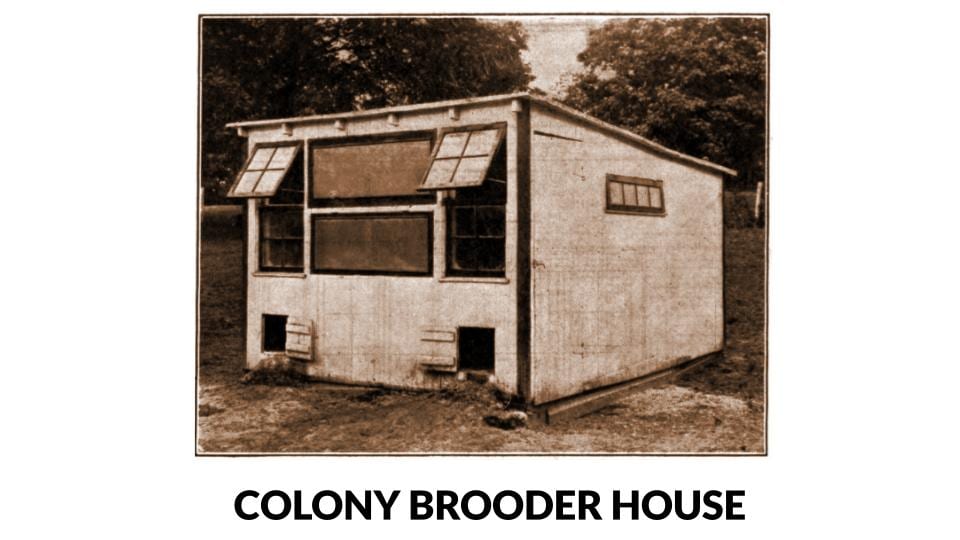
- Portable and easy to use for tending to brooders: can be built to different sizes and height. Successfully used by the United States Animal Husbandry Experiment Farm, Beltsville, Maryland.
- 10′ x 14′ (feet) is ample space for 300-400 chicks: but for best results, no more than 300 chicks.
- Built on runners for ease of movement: pulled by a vehicle across your site.
- Ventilated by: openings on 3 sides and ventilating board under eaves (especially for the summertime).
- Rain guarded windows: hinged at the top and swing outwards.
- Faux-windows: made of transparent plastic, to allow in UV light.
- Removable lower sections of the house: for increase ventilation and direct sunlight in warmer months.
- Stove heated: with a metal collared chimney to prevent burning of the roof. Plus waterproof against rain.
Long Brooder Houses
An alternative to colony-style brooder houses, more robust for winter brooding.
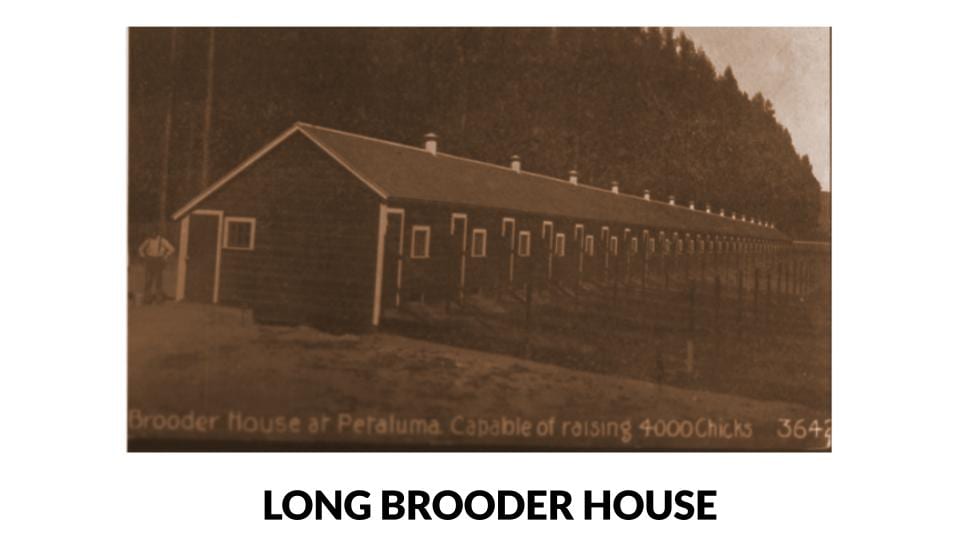
- 16′ by 14 wide' (feet): hot-water pipe design for winter months especially. An alternative heating system to hot-water-piping is a radiant panel.
- Used for rearing pullets after brooder age: they are reared here until they reach the point of lay.
- Made long enough for the desired capacity: but usually 75′ to 150′ (feet) long.
- Varying width: 14′ to 25′ (feet).
- Internally, the house is divided into pens: of 4′ to 6′ wide with an aisle at the end of the house.
- Concrete flooring: sanitary and rodent-proof & sloping concrete yards for cleaning ease.
- Heavy mesh wire layer just above floor: installed on frames for removal by cleaning.
- Concrete yard: for exposure of chicks to direct sunshine.
- Some poultry farmers choose not to provide the yard space: instead, they use cod liver oil feed supplement to complement the lack of sunshine.
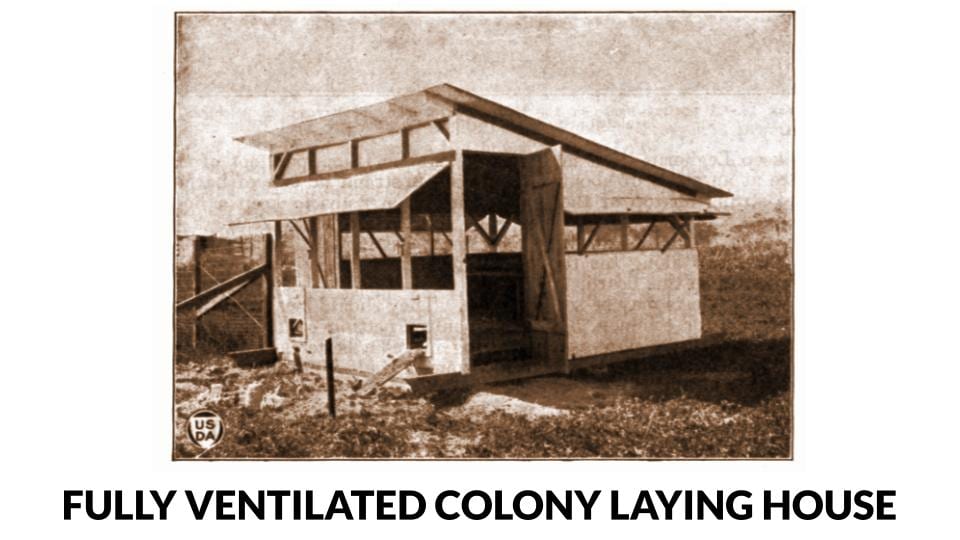
Laying Houses
Purpose made houses for your laying flocks throughout their productive lives.
- Backyard laying houses:12′ to 16′ (feet) deep only, because floor space is not that large
- Commercial sized laying houses: 18′ to 24′ (feet) deep, because of larger floor space.
- Deeper houses provide more comfort to layer birds: because deeper houses provide greater flock density which protects against draught.
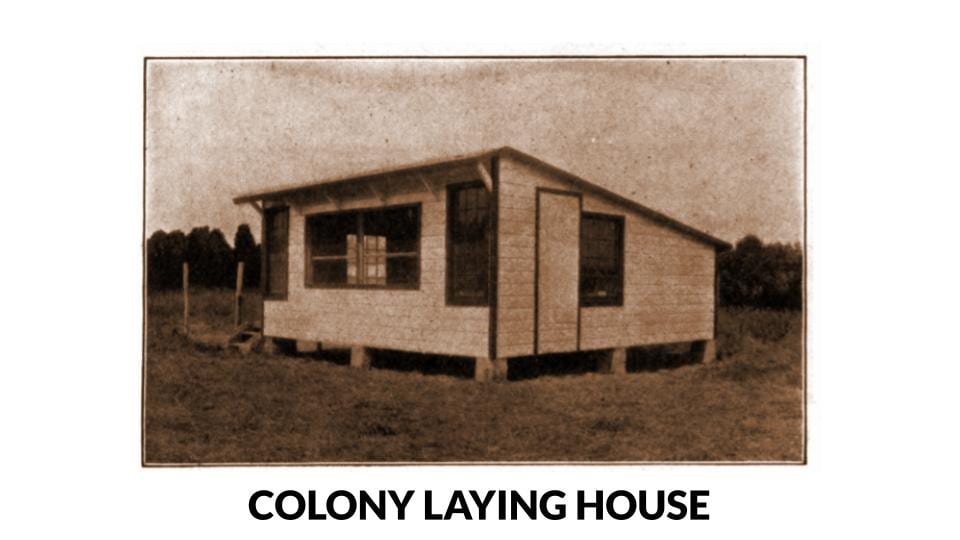
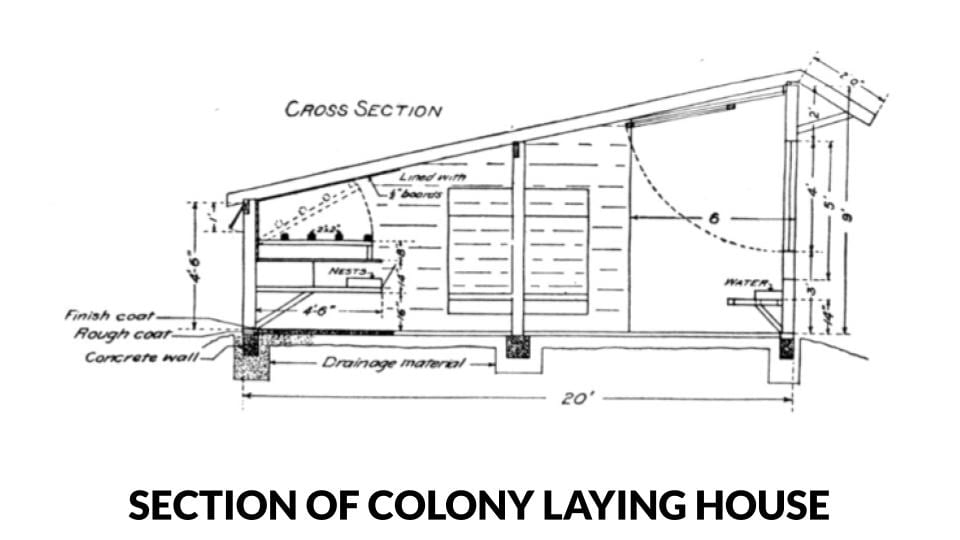
- Where land is cheaper and climate is mild enough: colony style housing can be adopted successfully each house having a capacity for about 25 – 100 birds.
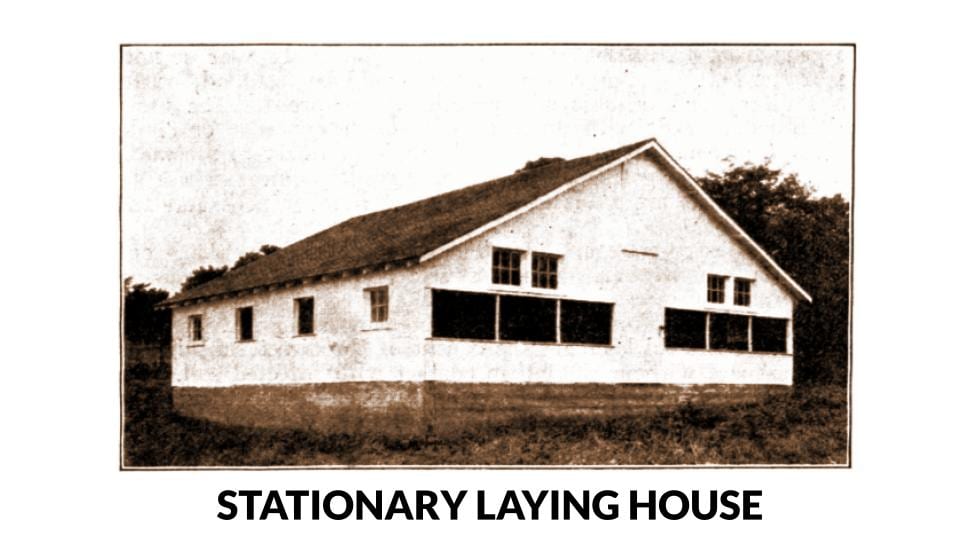
- Stationary laying houses are preferable for most medium to large farm and commercial-scale businesses: because of cheaper construction cost (single structure, rather than many), less land use (more compact layout) & less labour in looking after birds.
- Stationary laying houses support maximum yield egg production: feeding and management practices are optimised in this set-up vs. colony style.
- Breeding would favour colony style housing: to give breeders a rest in the winter by offering them a bit of range. This produces better quality hatching eggs.
- Typical stationary laying house features: single structures, long and continuous houses, either divided into sections or multi-storey (many floors).
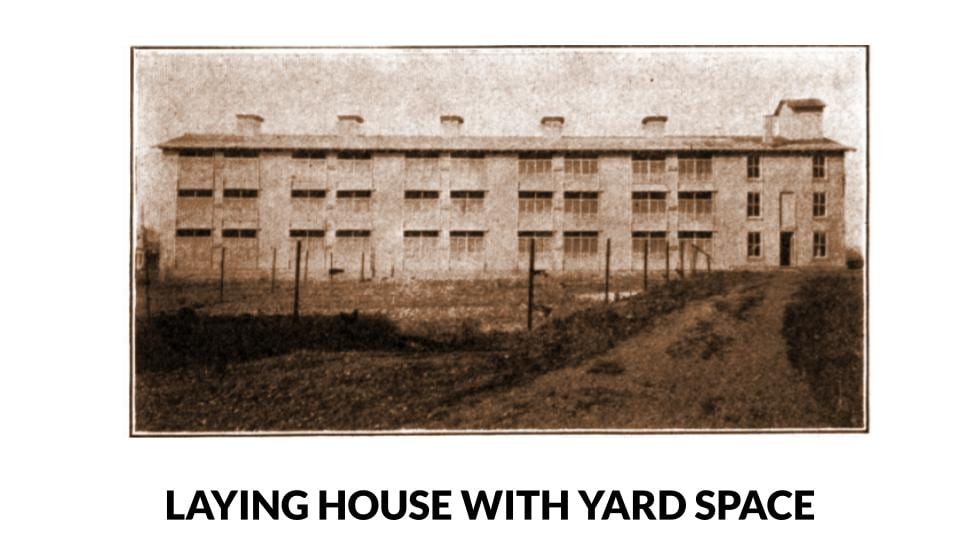
- Stationary laying houses are usually, 2-6 storeys tall or 30′ to 60′ (feet) deep): they are capable of housing capacity of several thousand hens at a time.
- On average, 1 sq. ft. of window space for 50 sq. ft. of floor space: is a general rule of thumb for ample exposure to natural light.
- In many cases, large farm barn buildings can be remodelled into multi-storey stationary laying houses: this is in an effort to conserve land space and to avoid unnecessary construction costs.
- If kept confined in this house long term without range, hens will not do well unless: clean, well ventilated, dry, draught free.
- Conveniently proportioned for labourers: to stand, work unhindered – therefore, about 2.5 to 4.5 sq. ft. per bird is adequate.
- Floor space allocation should vary: according to the housing system, size of the flock, weather condition & size of birds.
- More birds can be kept in a smaller floor space: where free-range is given at times during the year and the climate is milder.
- With larger sized flocks, 3 sq. ft. per bird for Leghorns and 4 sq. ft. per bird for general-purpose: is ample allocation for good results.
- In milder climate, where birds are kept in colony housing and free-range is given: then 2.5 sq. ft. per bird for Leghorn and 3 sq. ft. per general-purpose bird is enough.
- Colony sized housing is appropriate for flocks of 30 – 50 hens: as this scale of structure can be moved about relatively easily.
- Larger numbers are best kept in a long laying house: as a single flock, rather than smaller mini-flocks.
- Caring for larger flocks is more economical: less duplication of labour (not having to enter into multiple houses).
- Single flock rearing system is more disease prone: because of a lesser controlled environment, less individual attention from attendants and more densely packed floor space.
Yard and fences
This is the outdoor space surrounding the poultry houses that must be secured and is sometimes offered to birds as range.
- Usually confined to yards next to the house: which gives enough range to roam without wandering too far – for more efficient/economic management.
- Separate your flock: they should not have any contact with other livestock or wildlife to minimise the scope for transmission of disease.
- Ample amounts of clean and green space can add great value quality of bird and egg: foraging opportunities, fresh air and room to roam a little help to keep birds comfortable.
- Many farms adopt a 100% confinement model for layers: to maximise egg production.
- Where you have good grassland, allow up to 220 to 260 sq. ft. per bird (more space for poorer grass quality): this grants each bird enough roaming room and foraging opportunity.
- Frequently cultivated, sandy soil can support as many as 1,000 birds per acre: enough green food or vegetation for birds to get optimum benefit.
- Ideally, provide both front and rear yarding with 125′ to 150′ (feet) of depth & as wide as the house: gives birds enough liberty to enjoy the yard space.
- Rear and front yards are given to alternate the use: as one is being sown, the other is being occupied by the flock.
- General-purpose and meat (broiler) breeds require fences of 5′ to 6′ (feet) high, and Leghorns 6′ to 7′ (feet): to provide enough security against them fleeing the coop.
- To make sure Leghorns are securely penned in, provide a 30-degree upwards slope on the far fence post: this ensures Leghorns don't have enough take-off space to clear the fence.
- A bit of barbed wire also helps on top of the fence: as a deterrent to birds.
- Clipping flight feathers: really makes sure your birds remain grounded.
- Don't set boards at the top of fences: hens will look to perch on them.
- Wooden posts should be 8′ to 10′ (feet) apart and fencing should be hexagonal poultry netting: otherwise 16′ to 20′ for woven wire.
- Corner posts should be about 8″ (inches) in diameter, driven 4′ (feet) deep and braced: for maximum strength and integrity of the fence.
- Line posts should be 4″ to 5″ (inches) in diameter and driven 3′ (feet) deep: to keep the fence standing strongly throughout all seasons.
- Treat post ends which are driven underground with creosote of like- treatment: will preserve against rot.
- As an alternative to wooden posts, it is advised smaller metal posts or pipe be used: 10′ (feet) apart, which give a more tidy appearance and can be driven more easily.
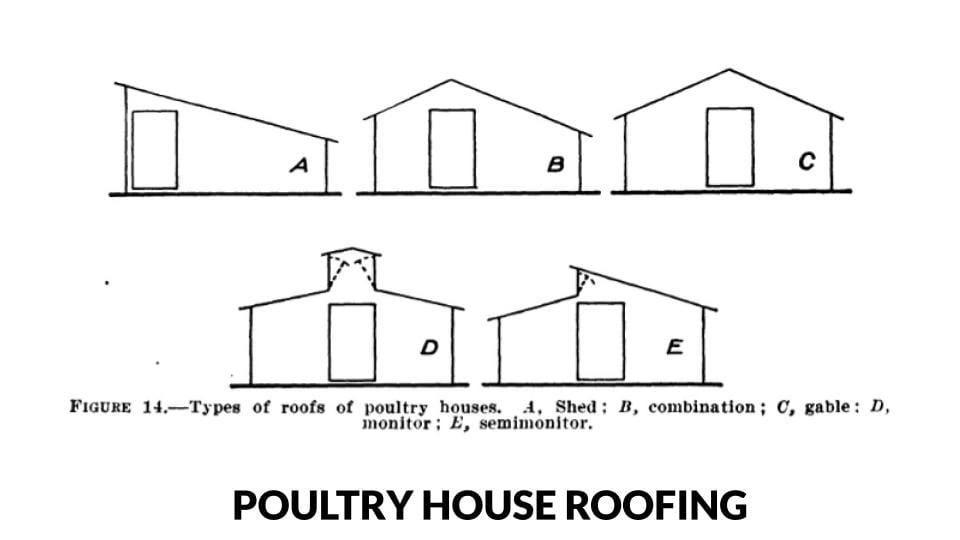
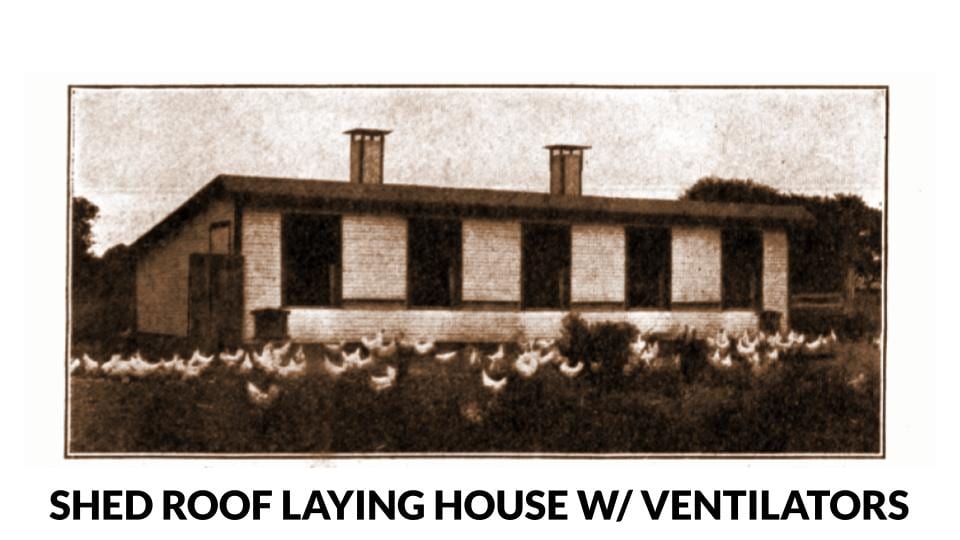
Roofs
Waterproof covering with ventilation benefits for all-weather protection of flocks.
- Well constructed and watertight: preventing the flock from being exposed to draft and rain.
- Shingle roofs not less than 1/3rd pitch (slant), but metal ones can be almost flat: because without a substantial run-off, water pooling can cause ingress and water seepage into the poultry house.
- Houses up to 20 ft. can adopt a single slant or shed roof shape: a girder in the middle offers just enough support to avoid sagging in the middle.
- Snowfall requires great girding: to enable the roof structure to successfully hold up under the additional weight.
- Combination or gable roofing is for houses between 16′ to 24′ (feet) wide: central peak offers 2 times the run-off potential of a single slant roof. Therefore the design can accommodate a wider scale.
- Monitor and semimonitor roofing are alternatives to gable slants: they provide similar structural benefit to A-frame housing.
- Shed type roof is cheaper than the combination rood: as it involves lesser materials and less labour. Plus, the combination roof looks better.
- Combination roof gives more headroom than shed design and better air circulation: because of the taller pitch in the middle.
- Gable roof is the most common type of roof for modern poultry housing: it offers the best air circulation and headroom.
- Gable roof at times is ventilated at the eaves with lath lattice: this allows for natural airflow provision for the flock.
- Semimonitor style roofing best suits very wide houses with a central alley: because it allows for more sunlight.
- Semimonitor faces south: so that the window openings face eastwards with the rising of the sun.
- Monitor style roofing has opposing windows: allowing for airflow and sunlight in from 2 different directions.
- Monitors laying houses can get drafty and cold: because of the double window exposure.
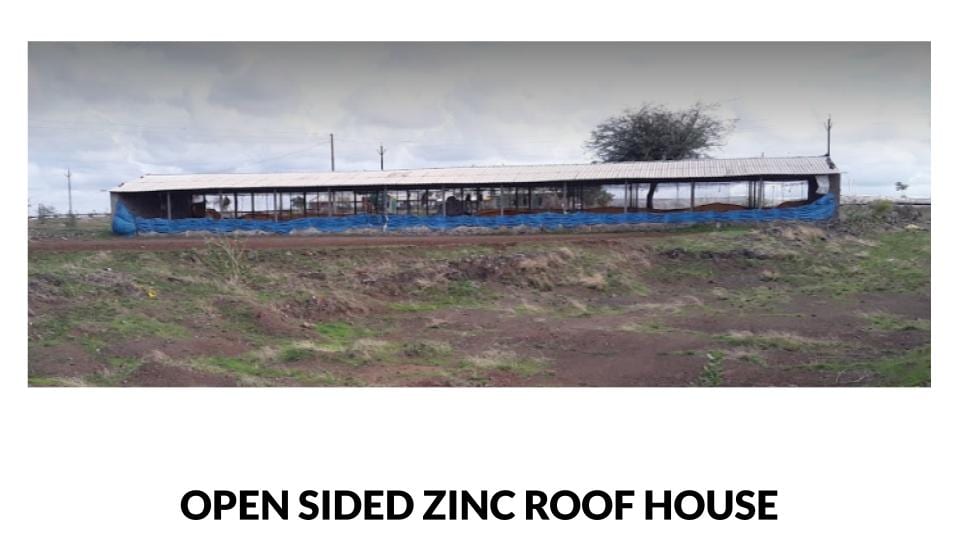
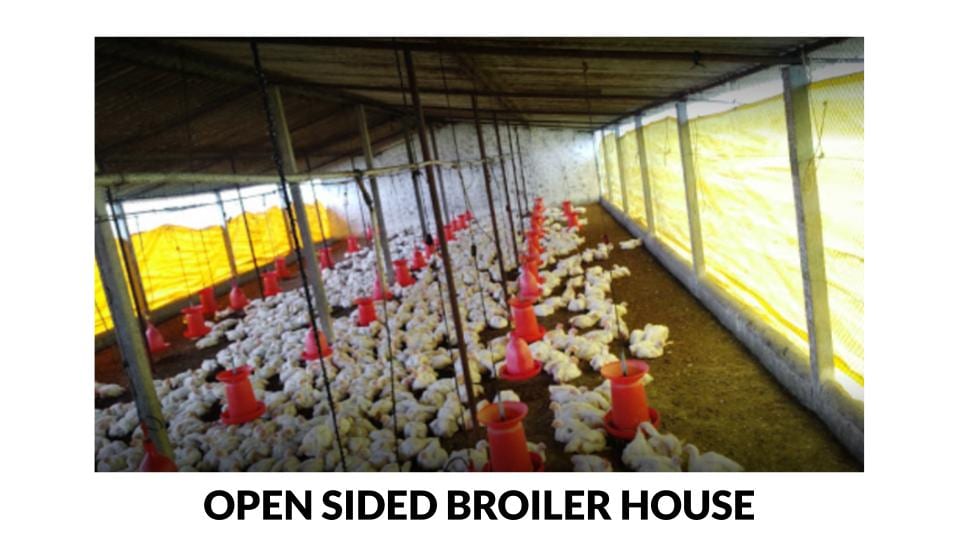
Front and rear
The poultry house often is built with outdoor access both to the front and rear of the house.
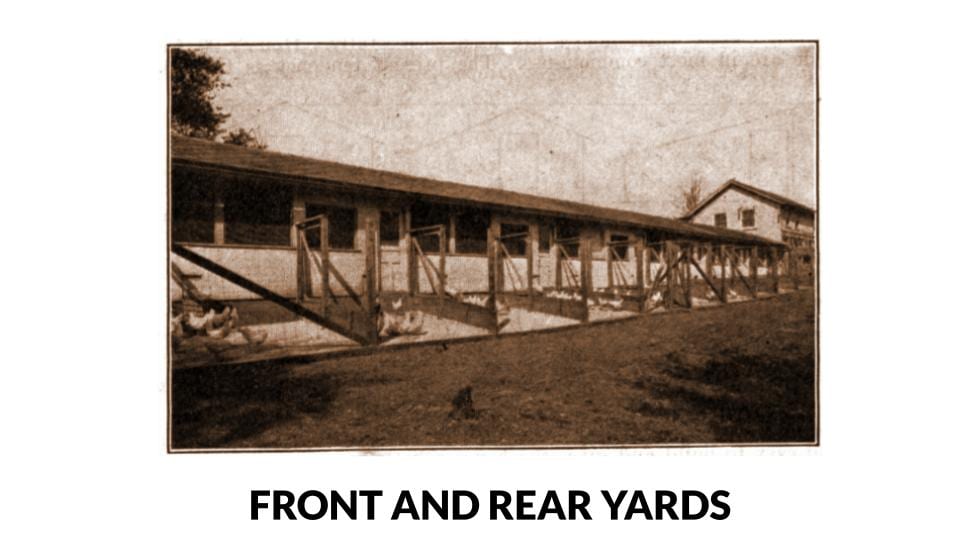
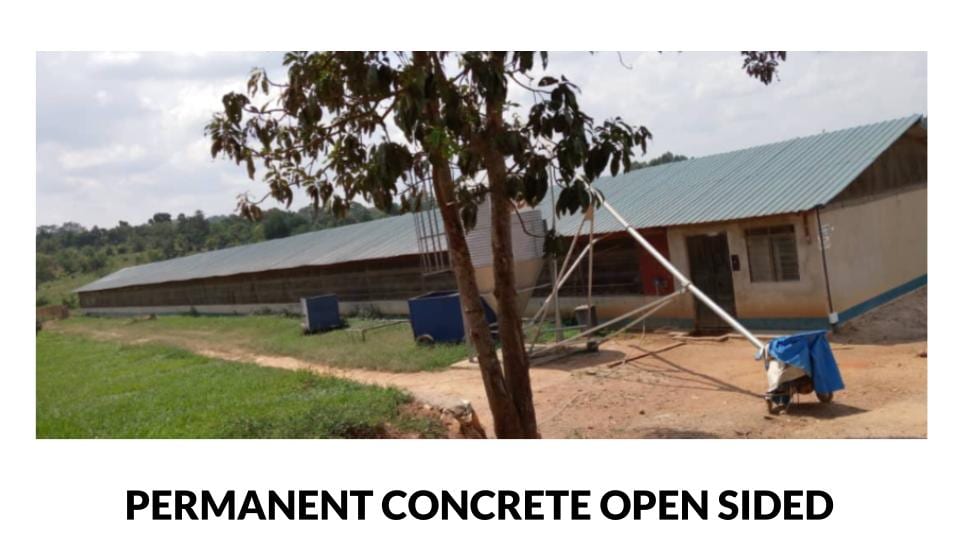
- In warmer climes, a completely open-sided design is adopted, whereas a partially open-sided building with curtains for cooler ones: preventing the flock from being exposed to draft and rain.
- Openings in the front of the house using glass or curtains: allow for adjustments to airflow and sunlight.
- Large glass area at the front of the house: acts as a heat trap – keeping things warm in the day and cold at night (because glass radiates heat naturally).
- Unbleached muslin cloth over the open side: keeps rain and wind out.
- For wider houses, use windows between the floor and the dropping boards: this provides ventilation for more densely packed flocks.
- Larger windows can be used for more exposure to sunlight, ventilation and distribution of litter material: this is because hens scratch litter away from the sunlight.
- Adjustable ventilation panels and weather shields just beneath the eaves: can be set to 45-degrees maximum and made to seal shut tightly to avoid sweeping rain entering the house.
- Double-wall construction provides better insulation: for cooler climates.
- The front of the house should be built high enough: to allow ample sunlight into the house even in the winter months.
- Windows and curtains should be arranged in such a way as to let in maximum direct sunlight when opened and raised: because this optimises the conversion of minerals within the body of the bird, amongst other performance benefits.
Floors
Poultry house flooring for birds, labourers and general ease of maintenance and cleanliness.
- Concrete flooring is best for stationary, permanent houses: they are sanitary, easy to clean, rat-proof, relatively inexpensive.
- Concrete flooring should be covered with litter: to maintain dryness and warmth for birds, where the flock has direct contact with the floor (i.e. not caged).
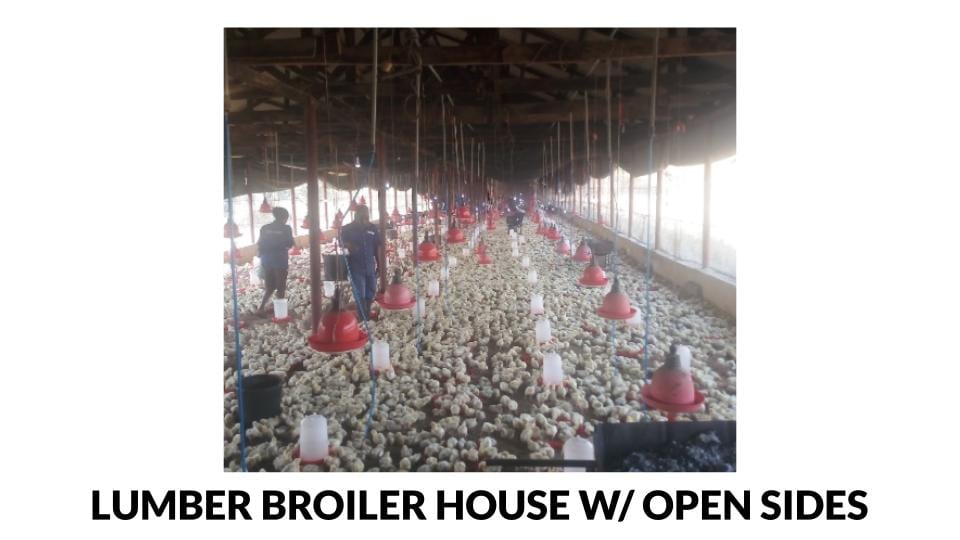
- Lumber flooring is best used where the floor is 1.5 to 3 inches above ground level or where the ground is uneven: lower space between ground and floor makes harbours for rats, and is prone to rot.
- Board flooring should be raised high enough for air circulation: this adds a further source of ventilation for your flock, plus this keeps the floor dry. This style of flooring is common in portable houses.
- Dirt floors should be avoided: they are dusty which pollutes the air quality and unsanitary. Plus, litter doesn't last as long on these compared with concrete or board floors.
Partitions
Dividing up the poultry house space into smaller compartments for better environmental control
- In long permanent poultry houses, build partitions every 40 ft. of length: to prevent drafts affecting the flocks.
- Also, roosts should be partitioned every 20 ft.: from the droppings board to the roof.
- Partitioning the house space also prevents overcrowding: as birds are physically encouraged to break up the flock throughout the house.
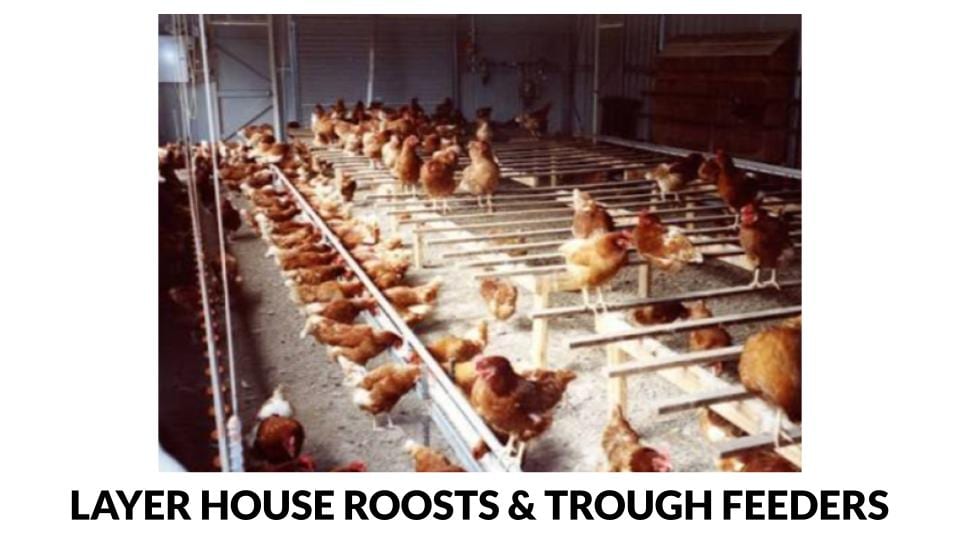
Roost and dropping boards
Internal fixtures and fittings of the birdhouses that encourage natural behaviour and collect droppings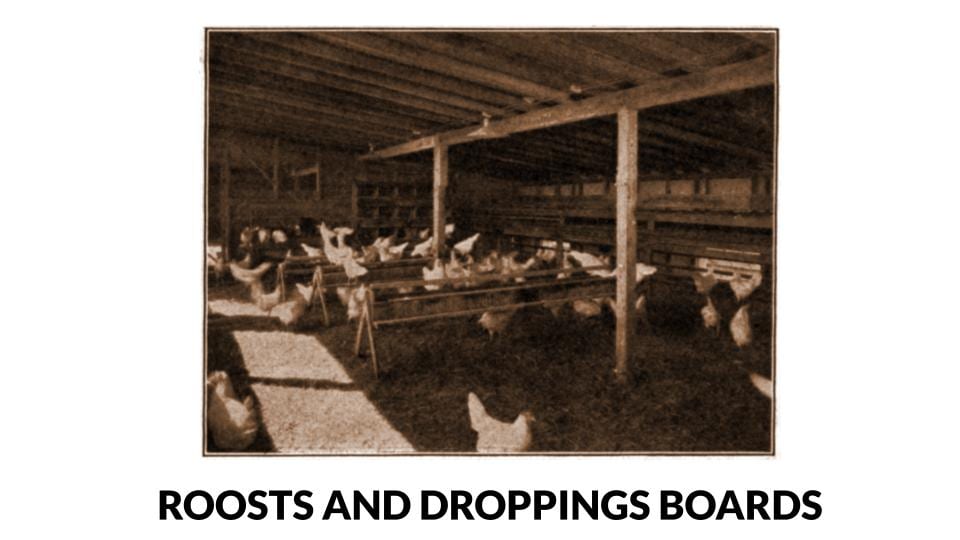
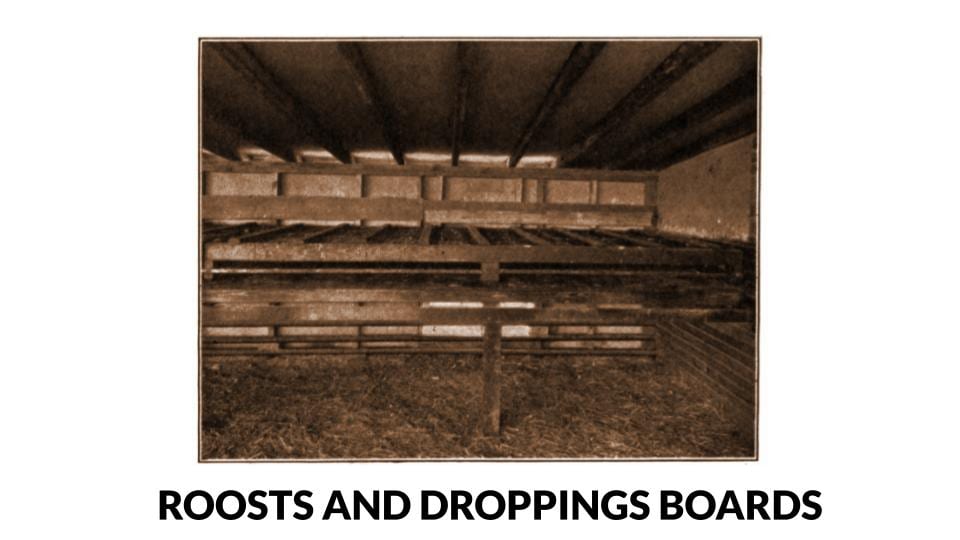
- Anthracene oil or another preservative will kill insects: keeping your flock's environment free from invasion.
- Roosts are placed near the back wall and 6″ to 8″ (inches) above the dropping board: hinged for ease of cleaning and infecting.
- Provide 7″ (inches) of roosting space per Leghorn bird and 10″ (inches) per Plymouth Rock: plus have roosts all at the same level, or else birds will fight to occupy the highest roost.
- Provide 3 roosts per 16′ ft. length of house, or 5 roosts in houses 20′ to 25′ (feet) deep: this gives enough variety of space use that you avoid the effects of overcrowding.
- For Leghorns, build roosts that are 13″ (inches) apart and 15″ apart for Plymouth Rock: but outer roosts should be at least within 19″ (inches) of the droppings board beneath.
- Guard the birds against reaching the dropping boards: by placing 1.5-inch mesh netting immediately beneath the roosts. This way you avoid the chicken pecking at their own waste and ingesting worm eggs often found in droppings.
Materials for building
Commonly accessible materials for building poultry houses with an affordable budget.
- Wood is the most versatile material for building poultry houses: it's cheap, can be torn down relatively easily, or changed when compared with brick, hollow tile or concrete.
- Lumber must be: durable & seasoned – if for outside. (Second hand or used lumber can also be used).
- Hollow tile is cost-effective compared with wood and durable: a very good choice for buildings that require insulated walls, like brooder houses or incubator cellars.
- Concrete houses are to be avoided: because they are, by nature, cold and wet.
Framework
Structural orientation of the poultry house and the assembly of its parts for best results.
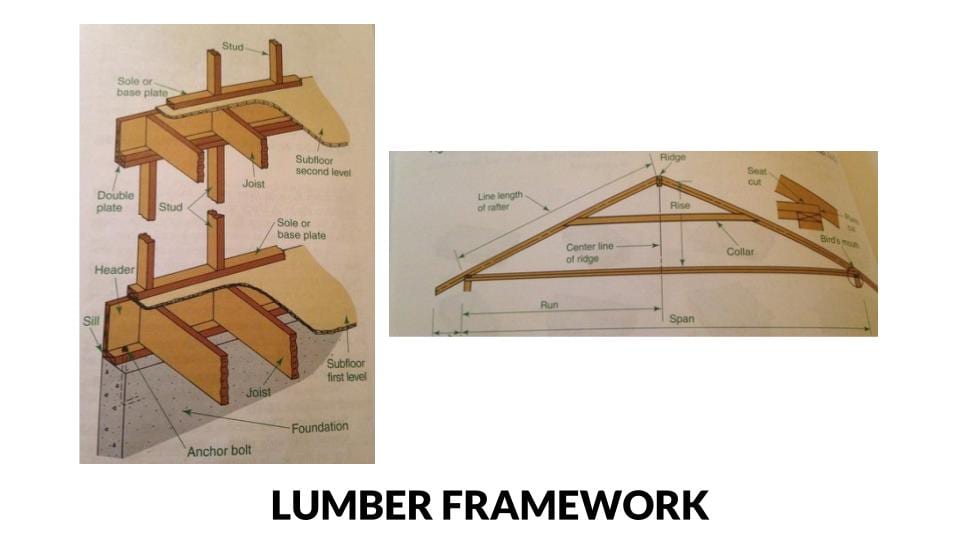
- Sills: support the building.
- Studs or uprights: rest on the sills.
- Plates: lay on top of the studs.
- Rafters: rest on top of the plates.
- Sills are placed on concrete supports, concrete walls or wooden posts: for stability.
- Wooden posts: should be 6″ to 8″ (inches) diameter, 6′ to 8′ (feet) apart and 2′ to 3′ (feet) in the ground/ below frost level. And they preferably should be made from cedar, locust, chestnut, redwood and cypress.
- Concrete posts: are more durable than wooden ones.
- Dimensions of the sills will differ depending on the size of the buildings: 2″ by 4″ and of lighter material for colony style or single-wall construction, or 4″ by 4″ (inches) for a larger house or on with double-wall construction. 4″ by 6″ (inches) for 2-storey birdhouses.
- Planting the sills closer together for heavier buildings (or lighter material of sill): provides more structural integrity and strength.
- Concrete wall foundations should be adopted for larger houses: in such cases, the sills are bolted into the concrete.
- For portable houses, use runner 3″ by 4″ (inches) or 4″ by 6″ (inches) as sills: the corners require extra bracing to resist snapping or shearing when moved.
- Floor joists should be 2″ by 4″ (inches) or 2″ by 6″ (inches), depending on the span: they should be fitted 16″ to 20″ apart from one another. If the floor span is more than 10′ (feet) then central support should be used for the joists.
- Rafters are chosen according to the load requirement of the roof and span: 2″ by 4″ (inches) for lighter buildings where the clear span is not more than 12 ' (feet) and 2″ by 5″ (inches) for longer roofs and where a snow load is expected.
- Purlins and girders should be used where rafters are more than 12′ (feet) long: purlins are usually 2″ by 6″ (inches) and set on the edge of posts as supports for the roof. They are placed lengthwise of the house and about halfway along the rafter they relate to.
- In ridged-roofed designs, a board is placed between the end of rafters: this keeps the ridge straight and even.
- Collar beams and crossties should be fitted, with dimension 1″ by 6″ (inches): to prevent splaying of rafters on gable or combination roofs. Position these collar beams and crossties as low as possible as to gird maximally, but not to interfere with headroom for labourers. If hens roost on them, cover the space between beams and rafters with wire netting.
- Rafters cut 2′ (feet) apart from centre to centre: to avoid wastage of roof boards when cut.
Floors
Type of alternative flooring for the poultry house – materials and designs for differing circumstances.
- Concrete flooring must not be laid in direct contact with the ground: otherwise, the floors will be damp and cold, leading to bird discomfort and perhaps disease. To combat this, install flooring on a deep and porous foundation and well insulated.
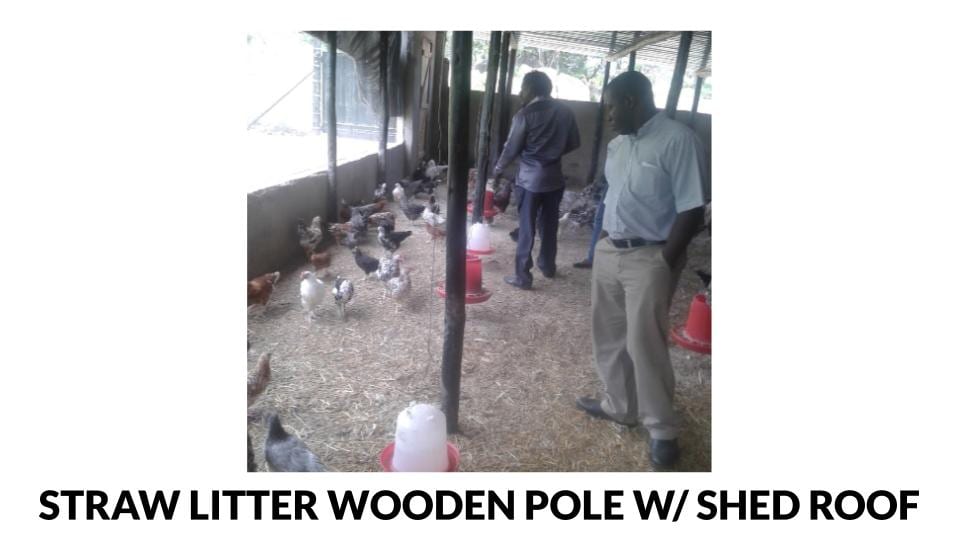
- An even and complete floor coverage with litter should be used: this helps to keep the floor dry and warmer for the birds.
- Best practice for concrete flooring: lay tamped compact foundation of cinders, broken stone or gravel, approximately 6″ (inches) deep, with 3″ to 4″ (inches) of cement flooring on top. Between the two layers (the foundation and the cement floor) it is advised that an impermeable layer of tarred building paper inserted. This prevents moisture from rising up from the ground and getting into the concrete, thus making the floor damp.
- Best practice for wooden flooring: lay single thickness matched flooring in milder conditions and climates. In cooler climates, use double floor layering, with lower layer boards set diagonally and tight: the space between layers and building paper will help to insulate and prevent damp absorption.
Walls
Upright structures for upholding the integrity of the building.
- Mostly, single-walled and nailed directly into the studs: this provides a good combination of optimal cost-effectiveness and satisfactory strength.
- In colder climates, use double-thickness walls with space in between and also a layer of building paper over sheathing: this adds to insulation, heat retention and thermal efficiency.
- Lumber of 2.5″ to 6″ (inches) thick should be used: because boards are likely to shrink a lot – even to produce cracks.
- The lowest board on the wall should extend beyond the sill: this makes sure the joint is entirely covered.
- Tight joints at the eaves: by cutting off the rafters with the rear wall and also covering the joint with roofing paper.
- Shutters under the eaves: allow for better ventilation in summer months and hot climates.
Roofs
Weatherproof, thermal efficient roofing design for poultry houses.
- 3-ply sheeting on the roof: to prevent heat loss.
- Planed on one side and laid close together: smooth side up helps you lay on prepared roofing successfully.
- Sheathing paper between sheaths and layers: this improves insulation and waterproofing.
- A slope of 1″ (inch) or more to the foot: to prevent pooling of rainwater, by quick run-off.
- The steeper the slant, the longer-lasting the roof: because it endures less weathering by preventing pooling of water.
- A good way of sealing off the end of the roofing paper is to bend them under the heating layer: this prevents the tracking in of rainwater into the roofing structure by capillary action at the edges of the roof sheathing.
Paints and whitewash
A covering for the inside and outside of poultry houses giving a clean, hygienic and crisp finish.
- Layer of paint (on the inside and outside) of the poultry house: adds a clean appearance and durability.
- Primer coat half paint and half linseed oil: is thoroughly brushed into the wood, to protect against moisture.
- Spread whitewash lightly and evenly: for complete coverage.
Artificial lights
Artificial lights are required to compensate for the lack of natural light in darker, winter months.
- Give hens 12 – 14 hour days with artificial lighting to extend winter months: this increases the proportion of eggs laid in winter months (but not increasing the total egg output of the farm).
- 40-watt lamps 10′ (feet) apart, with 2 lights in a pen of twenty sq. ft. : for even and satisfactory distribution of light.
- 6′ (feet) high with reflectors of 16″ (inches) in diameter and 4″ (inches) deep: for the appropriate intensity of light for flocks.
- Greatest concentration of light should be on the mash hoppers and water dispensers: to encourage correct patterns of feeding in the flock.
- Lights can be programmed on a timer: to ensure automated delivery of artificial lighting and reducing man-power labour hours.
Artificial heating
Power-generated heating for the correct running of flock management including watering and normal usage of the entire floor space
- Prevent freezing of water and keeping the house dry from damp and moisture: this ensures the folk is well watered, maintaining good feeding habits and that disease from damp does not occur.
- Well structured and insulated poultry houses ought to be artificially heated: or else it proves too costly and inefficient.
- Typical methods of artificial heating: hot water system, electrical panel heaters or stoves fueled with coal briquettes.
Insulation of walls and roofs
An additional layer that traps heat (reduces heat loss) laterally and vertically.
- Double walls for insulation: preventing sudden changes in temperature or sharp gradient. Plus, is a reducer to condensation.
Ventilation
Planned airflow system for the poultry house, helping flock obtain good quality of air aiding performance.
- Usually controlled by openings in the front of houses: this plus the rafters is usually more than enough to raise a flock successfully.
- No. (or frequency) or openings: is dependent on exactly how much ventilation is required for the climate, or flock density.
- Best practice for poultry house ventilation via openings & windows: 4″ to 18″ (inches) wide and high up in the front and back of the house. This is enough to avoid condensation moisture but still allow enough heat retention.
- On cold nights: rafter ventilation is all you need.
- Ventilator flues: are advised for houses with 24′ (feet) depth or more, and where walls are insulated. 1 sq. ft. of flue are for 100 hens. Flues should be just in front of droppings boards. Flues built with a slide to adjust depending on the weather.
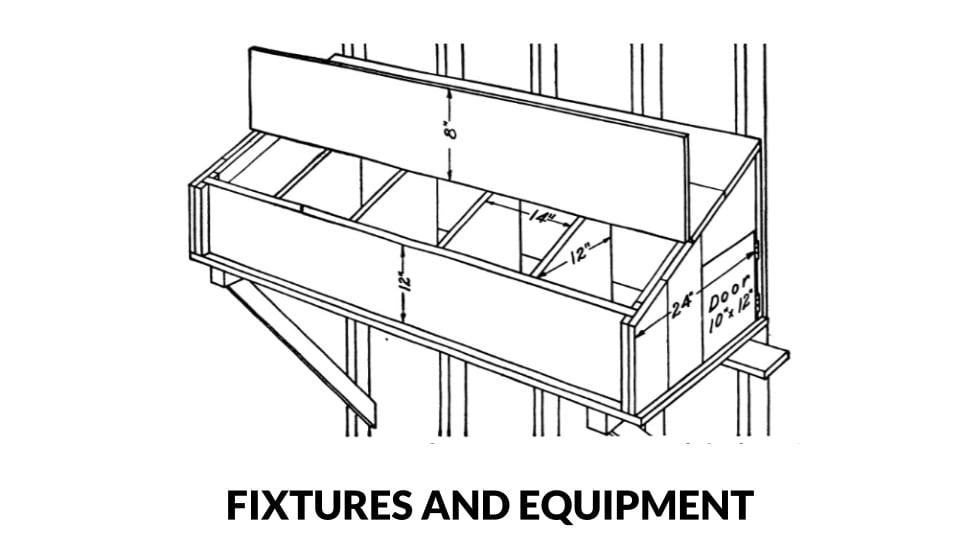
Fixtures & equipment
Nests, hoppers and drinkers – anything that would be provided to enable normal bird behaviour and facilitate performance.
- Avoid excessive items: otherwise interferes with bird behaviour, hinders the job of the labourers, adds unnecessary capital cost and makes cleaning more difficult.
Nests
Small, comfortable niches where hens can rest, lay and sleep.
- Location: placed on end walls or partitions & high enough that birds can work beneath them.
- User-friendly: arranged so then the hens can easily get into them.
- Dimensions & design: about 12″ to 14″ (inches) square, about 12″ (inches) high and a lip of about 4″ (inches) at the door to prevent litter from escaping or spilling out.
- Distribution: 1 nest for every 4 to 5 hens.
- Style: darkened nests for the minimal egg-eating habit of hens.
Dry mash hoppers
Eating containers for birds to gather and economically receive their feed.
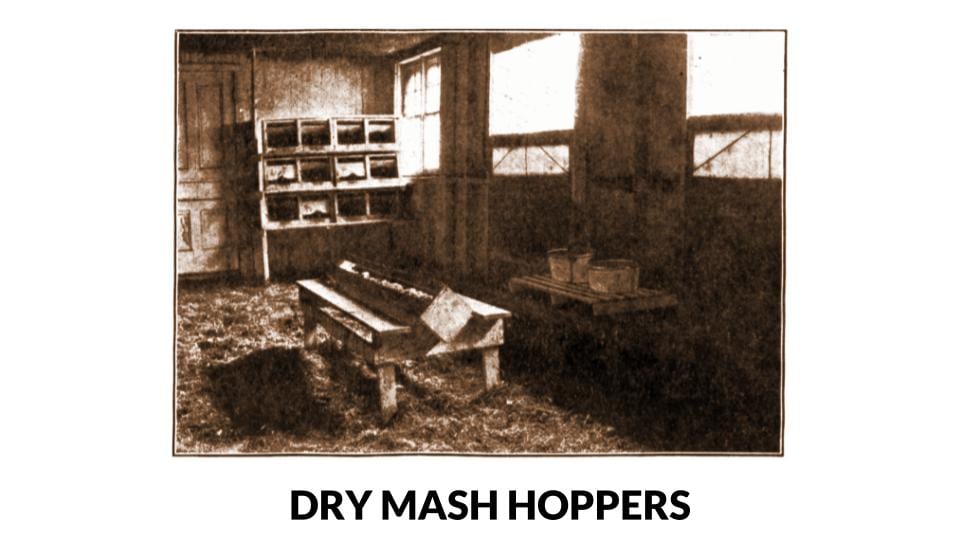
- Key benefits: minimal wastage of feed, keep litter and dirt out. This keeps your birds performing and growing a peak performance.
- Size: long enough to enable birds to eat with ample space and from both sides. 1′ to 1.5′ (feet) long for every 10 birds.
- Small sections added for shell and grit: to encourage these good eating behaviours.
- Small open troughs: are great for small birds and chicks and getting their feeding 2 to 4 birds at a time.
Drinking Stations
Drinking apparatus for birds to gather around and get refreshed.
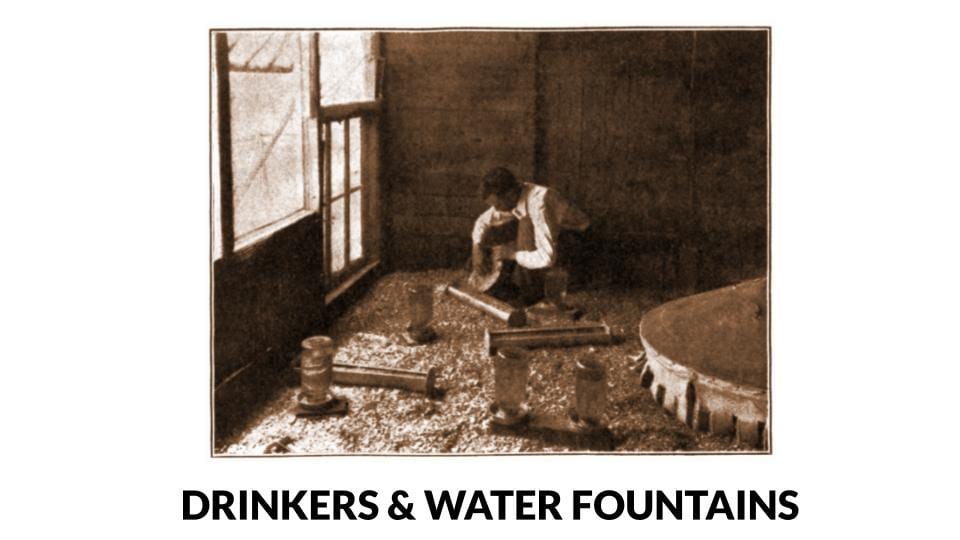
- Placed on platforms: to keep the dispensers sanitary and free from dust/dirt. Also, put slats on the floor of the platform to allow droppings to fall through for easy collection.
Poultry Farm Layout
These are just some of the practically useful poultry farm layout examples on the internet.
I pulled them together for your viewing pleasure and benefit, so to speak.
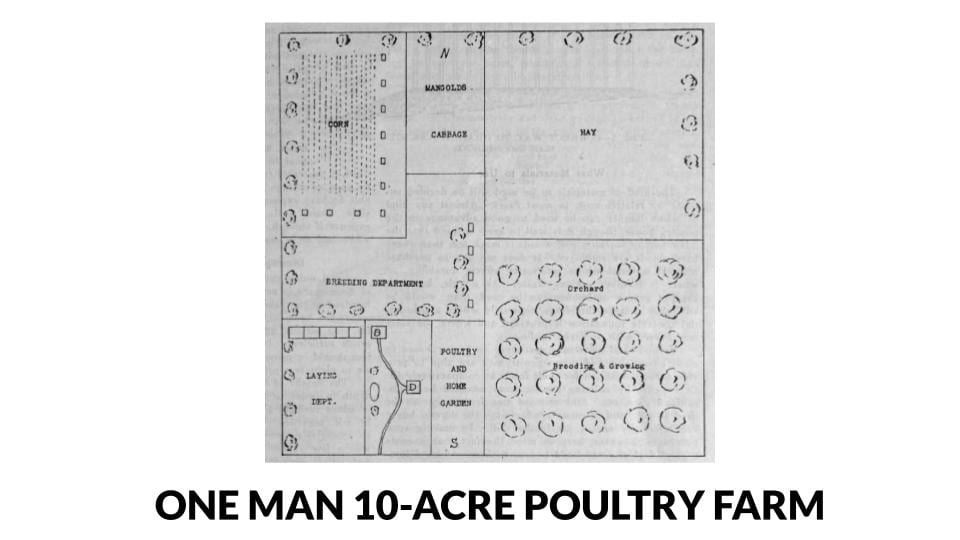
- One man 10-acre poultry farm: well-organised use of space for using a 10-acre plot and running a layer and breeder farm, with free-range access to crops for foraging. Natural windbreakers and orientation for sunlight etc.
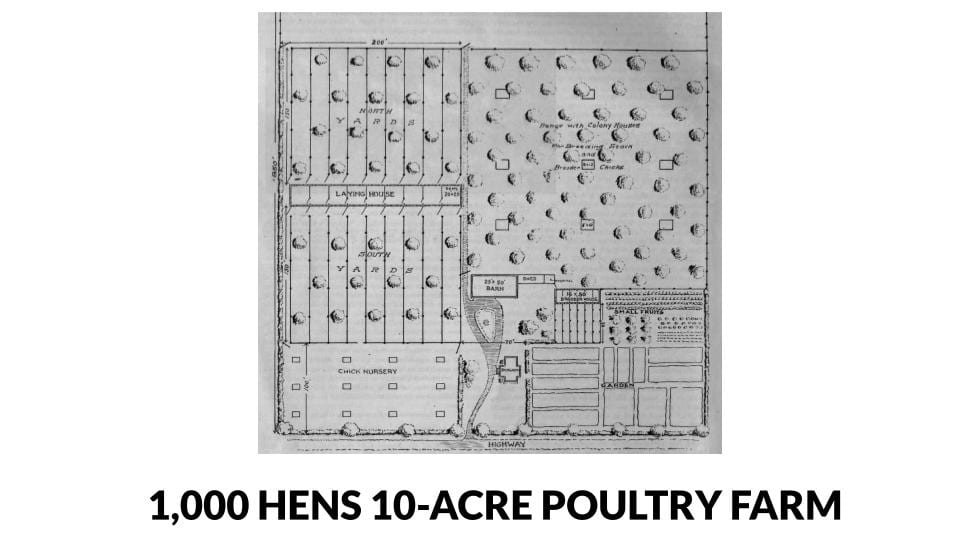
- 1,000 hens 10-acre poultry farm: well laid out plans for accommodating 1,000 hens on 10 acres.
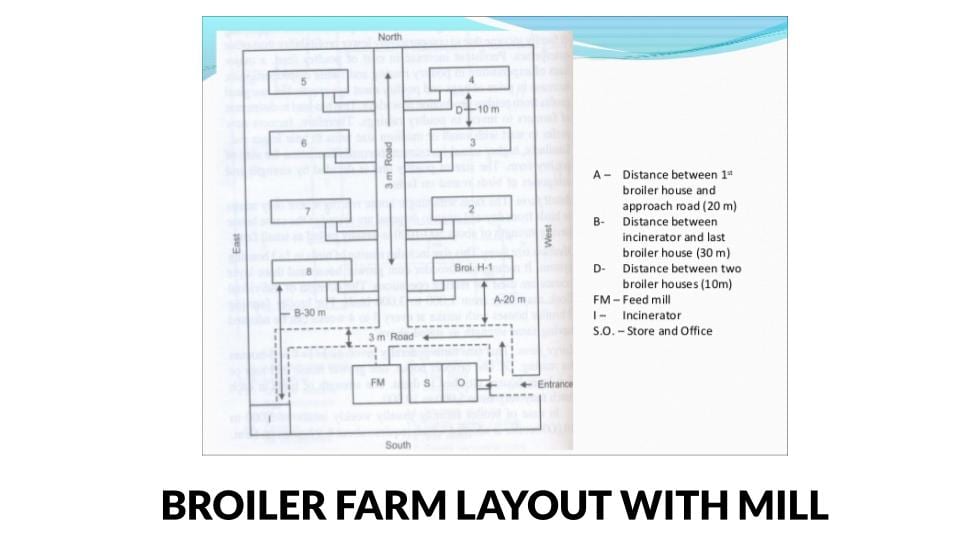
- Broiler farm layout with feed mill: a good example of spatially organising a simple commercial broiler farm, complete with feed mill and incinerators. I like the fact this plan details recommended distances between structures on-site.
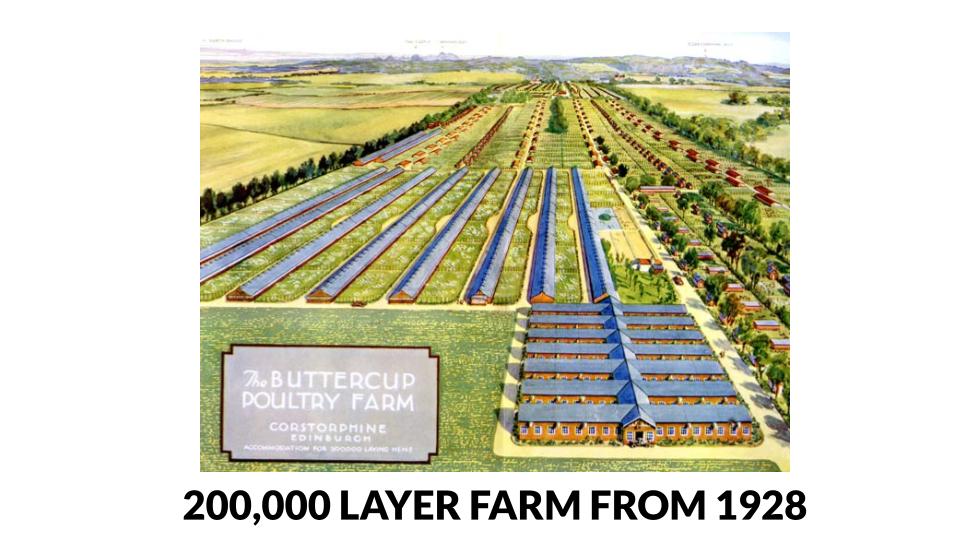
- Buttercup Poultry Farm Poster: a useful artist's impression of what a 200,000 layer farm would have been laid out like in the 1920s, for example. From the picture, you can only imagine that the smaller brown huts are where the brooder colony style houses were sited and perhaps where the pullets were kept. Layers, of course, were in the large houses.
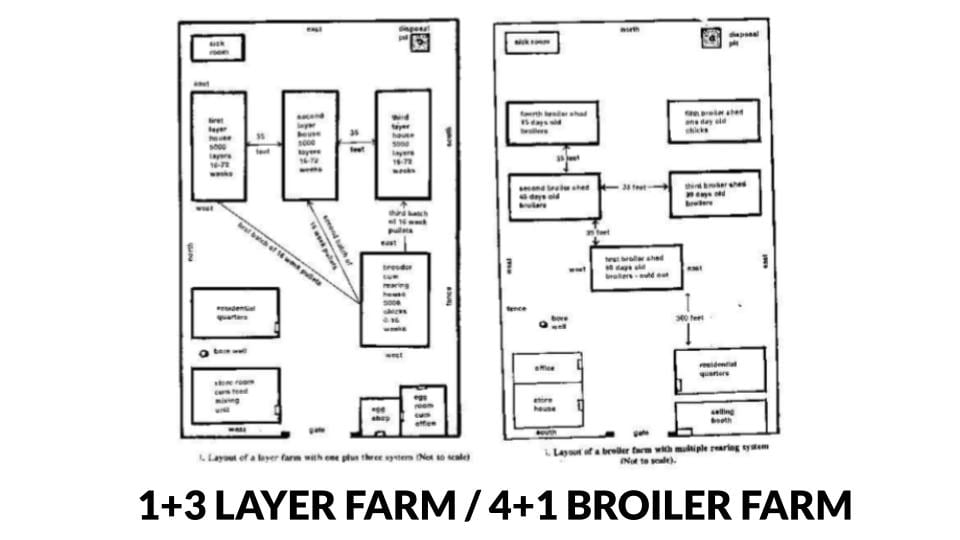
- 1+3 layer hen system and 4+1 broiler system: ever wanted to know what the layout plans would look like for your favourite layer hen or broiler rearing system? This is a simplified sketch (which needs LOTS of zooming up) that helps puts things into perspective for you.
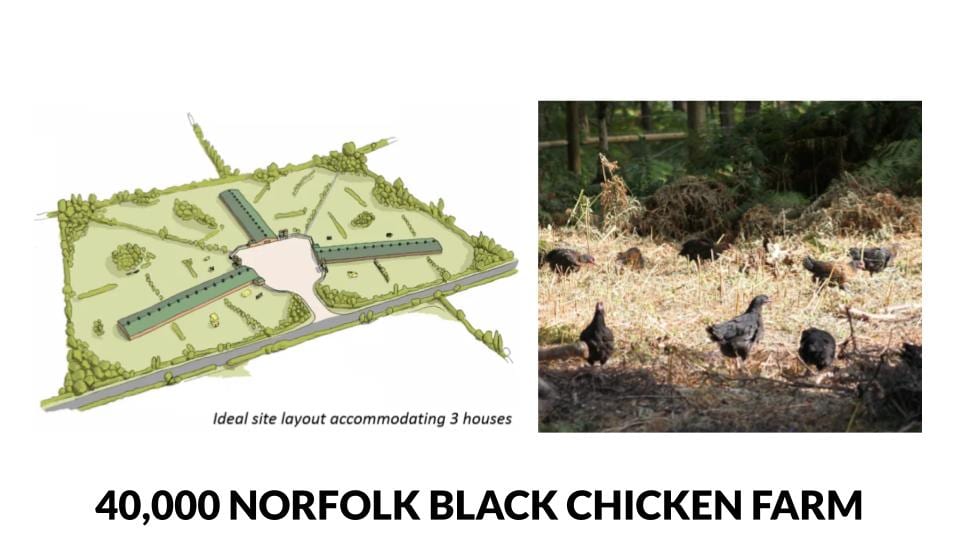
- Norfolk Black 40,000 bird free-range farm plans: according to Norfolk Black Chicken (www.norfolkblackchicken.com) this bird is: "…corn fed and slow grown for succulence and an unrivalled depth of flavour." This is an architectural drawing and plan for a 40,000 strong, 3 shed free-range farm.
- How to design a modern automatic chicken farm (Africhic): this next example I've included as a useful step-by-step tutorial for designing what might be a more modern approach to poultry farming.
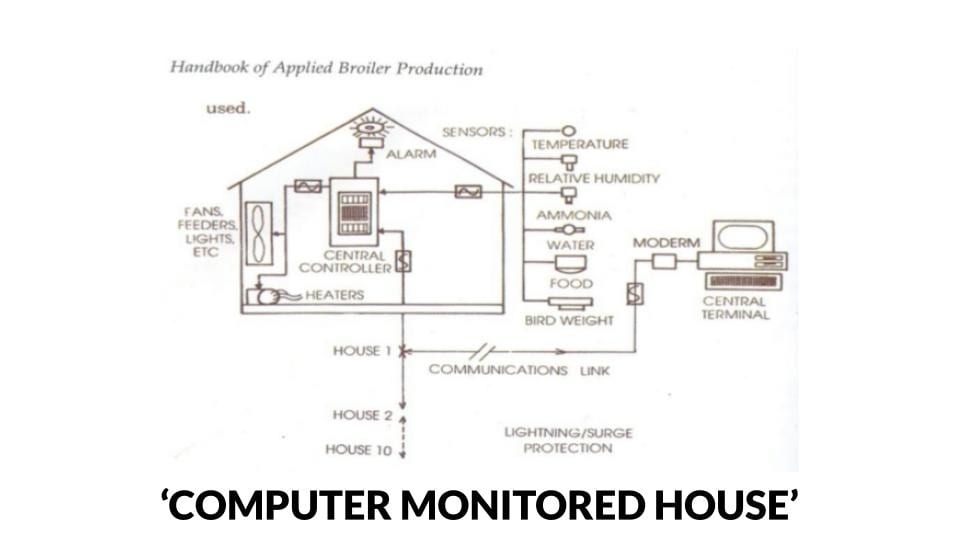
'Controlled Environment' Houses
Now, you might have landed on this post looking for something a little more technological.

Perhaps a computerised automated house capable of housing 100,000 birds, with a control shed and all the motorised and programmable help possible.
If that is the case,
I have a serious investment proposal for you.
What would you say if a leading, international poultry farming professional told you that:
…a controlled environment shed could increase your feed conversion ratio by as much as 1 point?
In his own language,
"For larger companies, one FCR point is worth up to US$ 300,000 per year."
Here is my analysis on how you can take Dhia Alchalabi's advice and practically make it profitable…
My take:
- "Increase Your Poultry Profit By $300,000 with optimal environmental control." (Premium Newsletter & PDF): a thorough guide into how you can use tight poultry house environmental control to slash your feed costs and rocket your profit.
- Computer monitored house: this is a simple schematic diagram of how a computer monitored house is relayed in a circuit. A good overview if you are new to the idea.
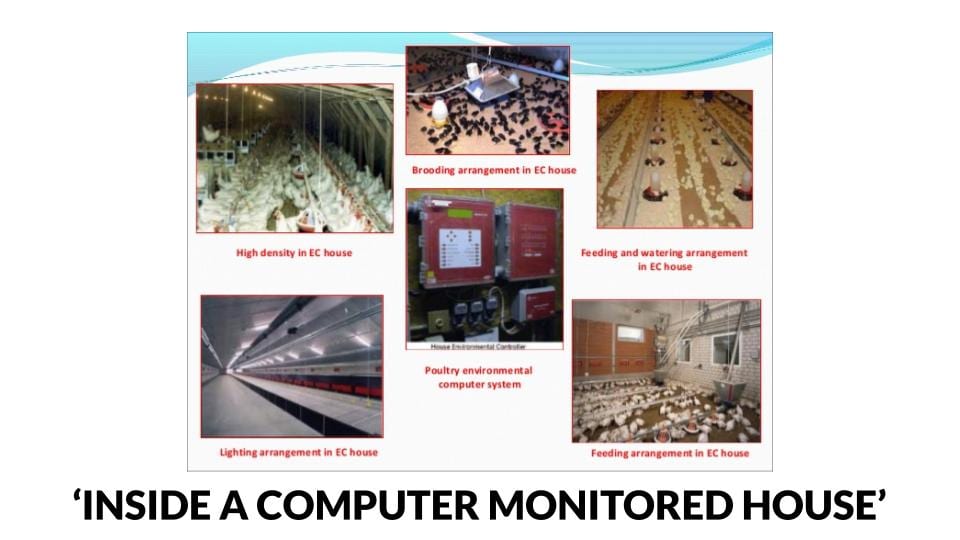
- Poultry housing (Slideshare): An academic approach to a guide on poultry housing – very thorough and a good slideshow format – a kind of picture book on everything you might find in a commercial scale environmentally controlled chicken house.
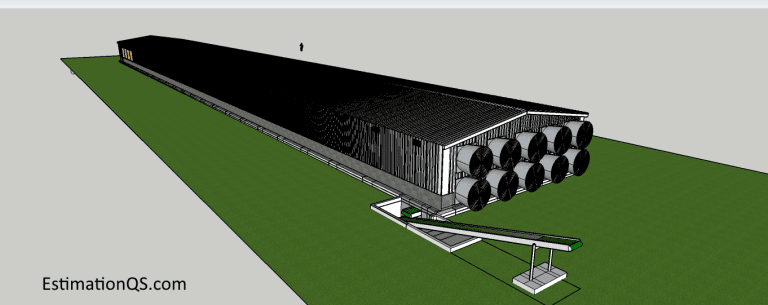
QS construction plan of an automated house
Pictures of an automated, environmentally controlled poultry house are actually quite easy to find online.
However, getting quantity surveyor approved plans and accurate cost estimations is HARD.
This is why I have included this next section a reference to www.estimationqs.com
Authored by Derrick Navara [a qualified Quantity Surveyor 'QS' with experience in construction-related projects],
The website hosts THE MOST detailed QS plans of some very complex construction projects, including…
This one (essential if you're planning a computer-controlled poultry house):
- Cost of building a poultry house for 20,000 layers: an impressive step-by-step tutorial for building an automated environmentally controlled poultry house for 20,00 layer birds. Every nut and bolt is accounted for here in this cost analysis and with precise amounts of material – with layouts. Great work.
Budget calculation of an environmentally controlled poultry house
As a first-timer…
…calculating a detailed construction budget for an 'environmentally controlled' poultry house is near impossible without professional input.
It's a completely different type of project to building a wooden shed.
For a start, half of the components involved are completely foreign to most laymen.
But without accurate estimates, you simply can't calculate the capital cost or raise funding.
So, I put this chart together based on the findings of Derrick Navara of Estimation QS.
Here it is:
- Cost of building a poultry house for 20,000 layers (COST ANALYSIS CHART): a proportional breakdown of the construction cost elements of the project.
(Source: https://estimationqs.com/cost-of-building-a-chicken-house-for-20000-layers/)
A 1,000 bird poultry shed construction budget calculation
In response to a question from one of my readers,
I wrote this example budget calculation for a 1,000 bird pen.
As a premium subscriber, I'll answer your questions via my Q&A board.
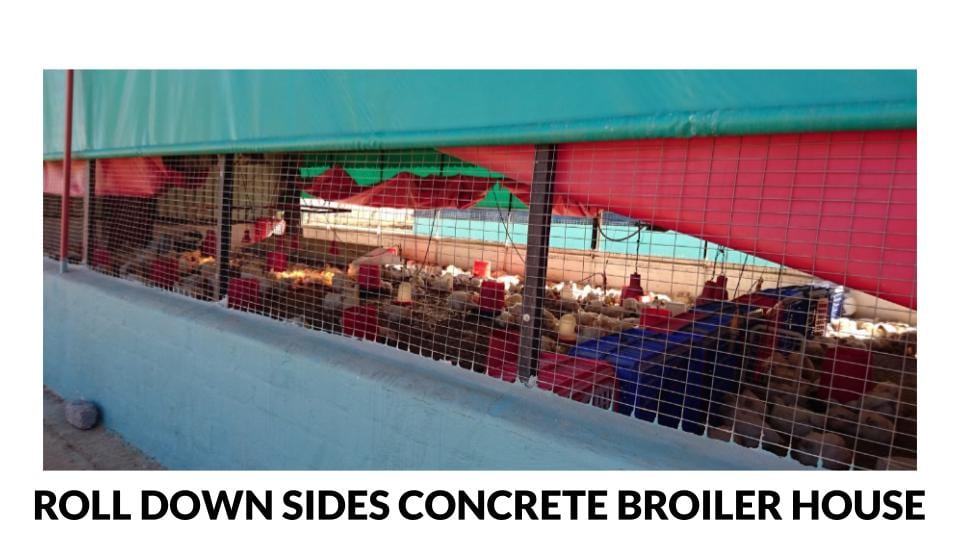
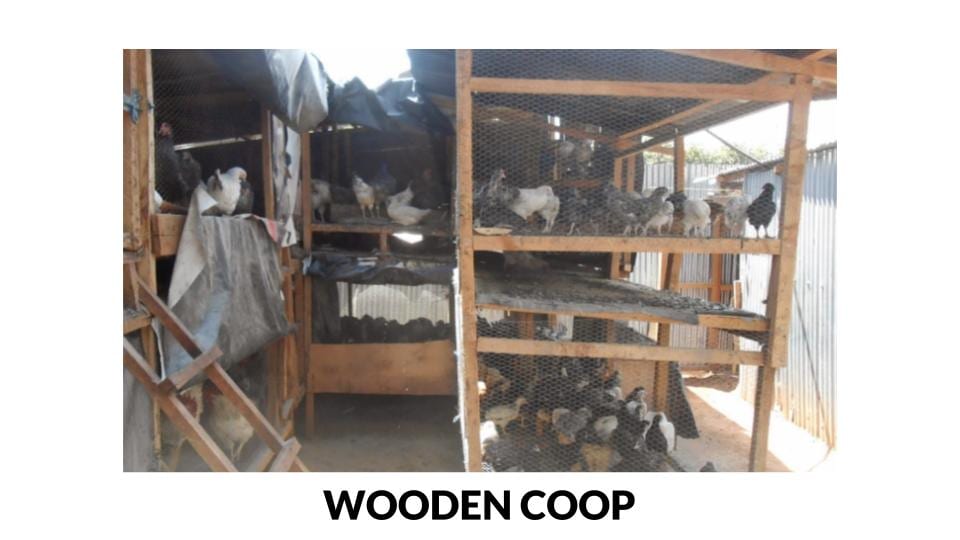
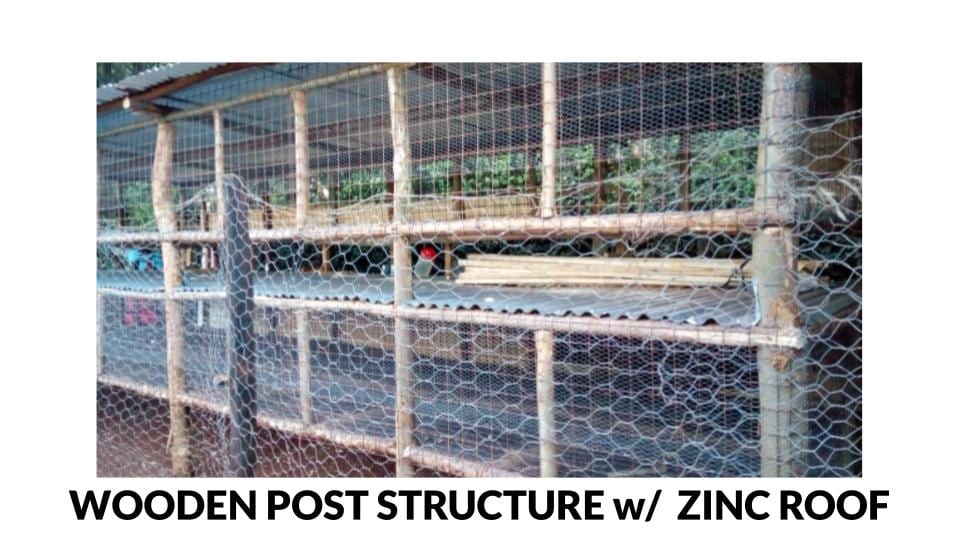
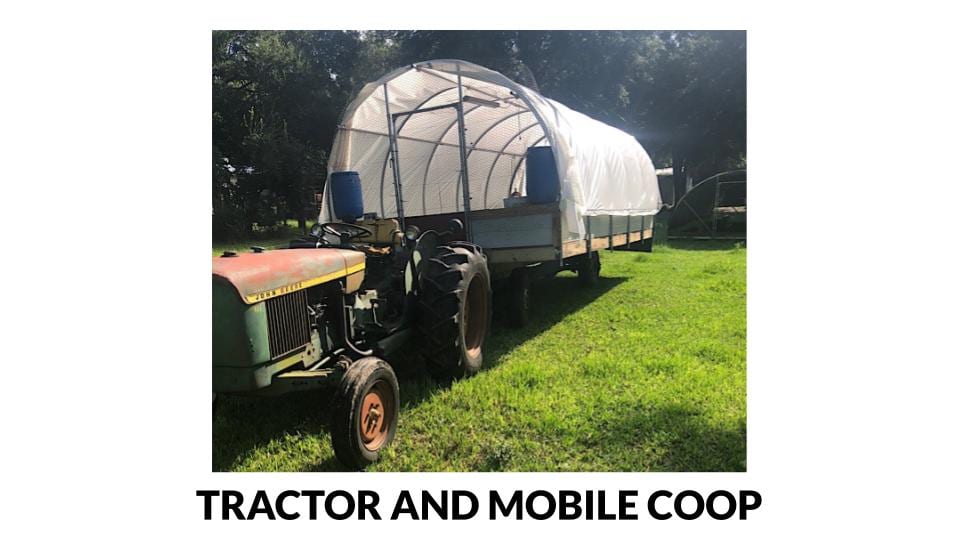
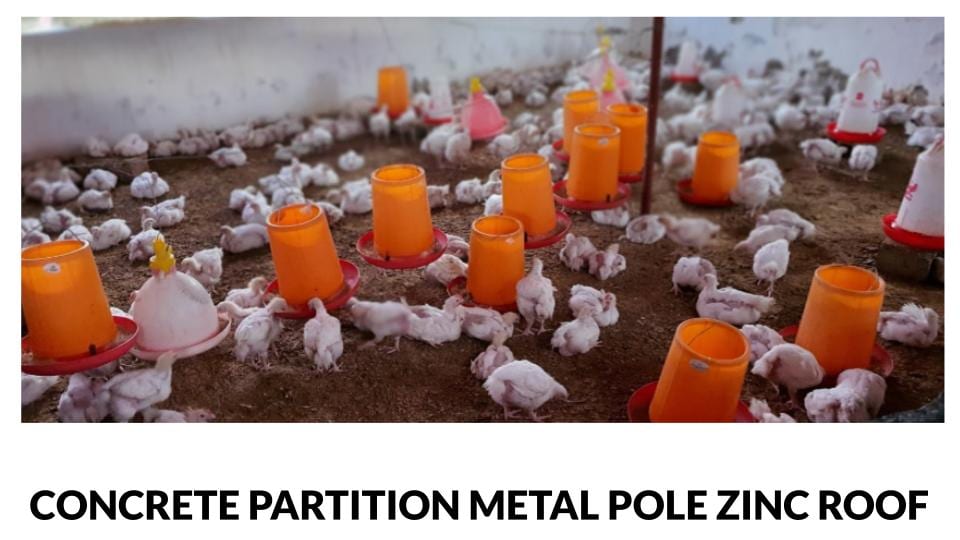
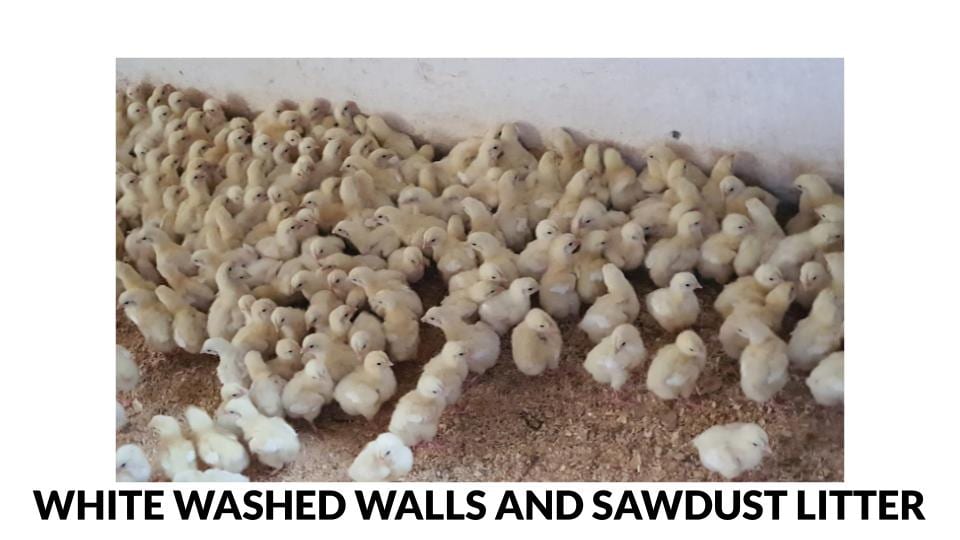
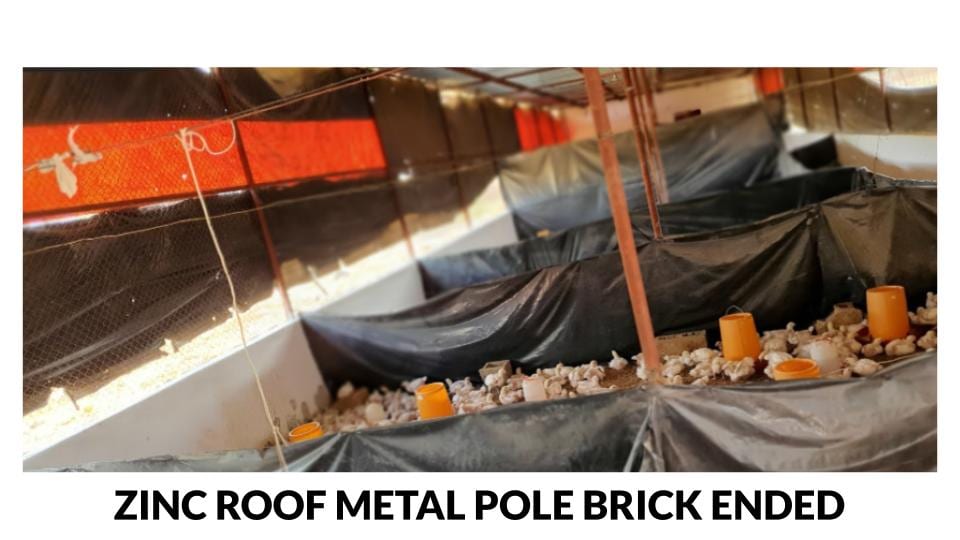
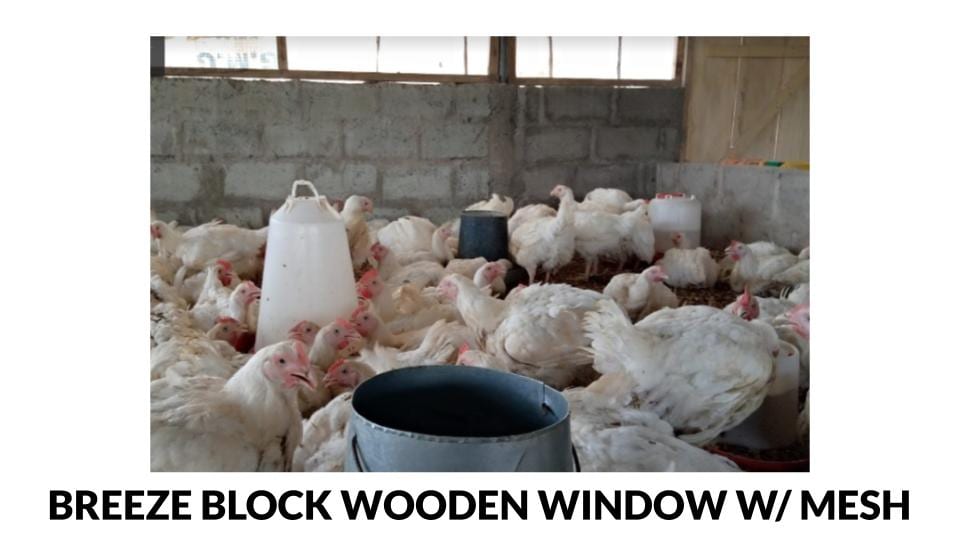
Example Poultry Houses from around the World
In this section, I share some leading examples of poultry house designs from around the world.
I've taken a selection of houses with different:
- materials
- sizes
- systems
- use
…and on different types of land, locations and in a variety of climates.
They should help you have an eye for what currently works out there.
Please don't think that these are entirely representative of each country's poultry farming enterprises –
Rather think of this as a photo scrapbook of example poultry farm buildings.
I tried to make them as varied as possible to appeal to many types of poultry business model.
(Also, for a decent beginner's overview of poultry housing systems, complete with pros and cons take a look at this guide: https://agro4africa.com/types-poultry-housing-system/)
India
- India Poultry Farm No.1: ANE, At Post : Shindewadi, Tal: Junner , Dist : Pune, Shindewadi, Maharashtra 412411, India. (LINK)
Nigeria
- Dayntee Farms Limited: Kilometre 5, Offa Rd, Amberi Village, Ajasse Ipo, Nigeria. (LINK)
South Africa
- Ismails Poultry Farm (LINK)
Kenya
- Kari Imrpoved Kienyeji Chicken: Ruaka Town, Muchatha, Kenya (LINK)
United States
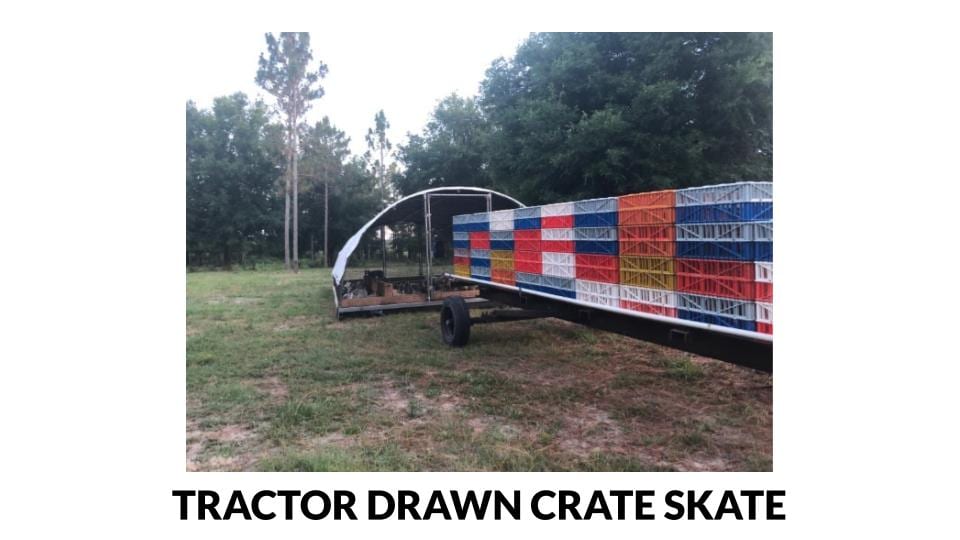
- Pastured Life Farm: 6944 210th Pl, O'Brien, FL 32071, United States (LINK)
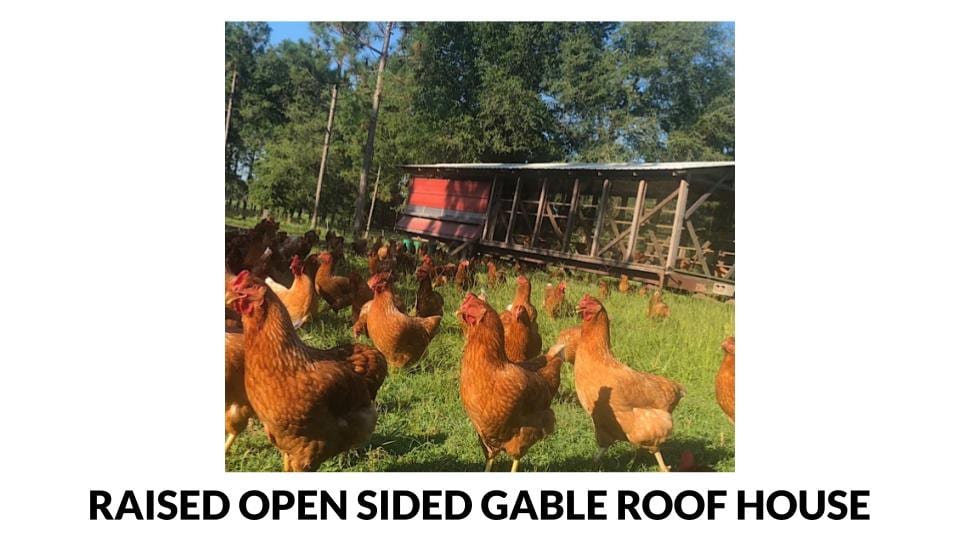
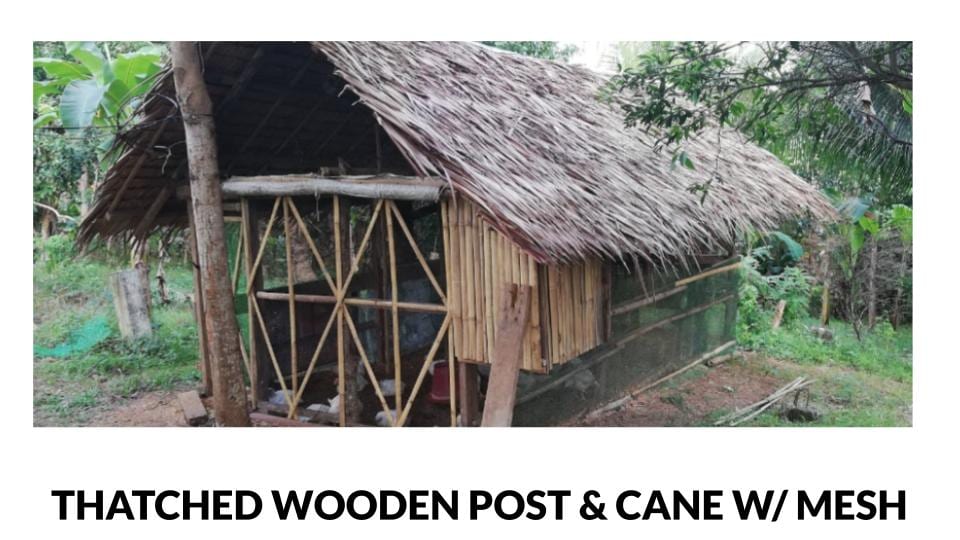
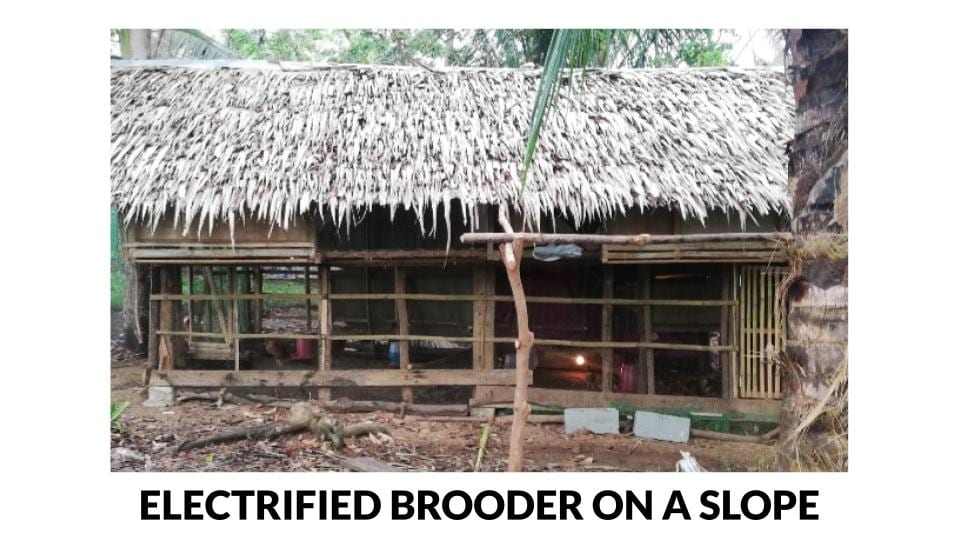
Philippines
- Fermi Farm Free Range: Unnamed Road, Pola, Oriental Mindoro, Philippines (LINK)
Zambia
- Poultry & Farm: Makeni Konga Makeni, Zambia (LINK)
Ghana
- Westhood Farm: Sasaabi, Ghana (LINK)

Uganda
- Kande Poultry Farm (Uganda) Ltd.: Semuto Town council, Sebagaala Zone Semuto Town Council, Uganda (LINK)
Zimbabwe
- Rising Dawn Livestock And Poultry: 99 Seke Road, Hatfield, Zimbabwe (LINK)
Now, over to you…
That complete's this guide to poultry houses.
I included various designs, structures with their plans, construction budgets with materials costs, site layout, systems of housing, components, photos and even country examples…
Are you currently planning a poultry house construction project?
Do you have experience with poultry buildings and have something to add?
Either way, I'd be interested to hear from you.
Leave a comment below, now.
References
https://estimationqs.com/cost-of-building-a-chicken-house-for-20000-layers/
https://quizlet.com/53374101/unit-12-print-reading-for-construction-residential-and-commercial-flash-cards/
https://patents.google.com/patent/US3206121
University of Noth Texas Digital Library
Sonoma Library
www.alphafarms.co.uk (featured image)
Design for Commercial Poultry House Plans
Source: https://thebigbookproject.org/agri/poultry-farming/houses-chicken/
0 Response to "Design for Commercial Poultry House Plans"
Post a Comment